Train Smarter, Not Harder: How Cyclists Over 40 Can Avoid Burnout and Ride Stronger

You’re out on your bike, chasing that familiar thrill – the wind in your face, the rhythm of your pedals, the open road stretching ahead. But as a cyclist over 40, you’ve noticed it’s not quite the same. The long rides that once felt effortless now demand more recovery. The high-intensity sessions leave you drained instead of energized. And that nagging fatigue? It’s creeping in more often, threatening to derail your love for cycling.

Here’s the truth: age isn’t the problem. It’s how you’re training. Too many cyclists over 40 fall into the trap of pushing harder to keep up with their younger selves, only to hit burnout, injuries, or a performance plateau. At Peaks Coaching Group, we’ve spent years helping master cyclists ride stronger, longer, and smarter – without sacrificing their passion or their health.

In this post, I’ll show you why training harder isn’t the answer, how to train smarter with a data-driven, personalized approach, and what it takes to unlock your best performance yet, no matter your age. Plus, you’ll get our free Smart Training Checklist for Cyclists Over 40 to start optimizing your rides in under 10 minutes.

Let’s get you back to riding at your peak – without the burnout.

Why Pushing Harder Holds You Back

Cycling is addictive. The thrill of crushing a climb or nailing a sprint keeps you coming back. But as you cross into your 40s and beyond, your body changes. Muscle recovery slows, endurance takes more effort, and life – work, family, responsibilities – demands more of your energy. If you’re still training like you did in your 20s, hammering every ride without enough rest, you’re not just risking burnout – you’re setting yourself up for frustration, fatigue, and even injury.

The mistake isn’t effort; it’s direction. Training without purpose leads to a cycle of overtraining: you push too hard, skip recovery, and end up stuck, wondering why your performance isn’t improving. The secret to riding stronger at any age isn’t more miles or more intensity – it’s smarter training that respects your body’s needs and aligns with your goals.

At Peaks Coaching Group, we use a data-driven, personalized approach to help cyclists like you avoid these pitfalls. Our 4-step framework – Assess, Plan, Train, Recover – ensures every ride moves you closer to your peak without breaking you down. Here’s how to start training smarter today.

Know Your Body’s Signals

Your body’s talking – are you listening? As a cyclist over 40, you can’t ignore the cues that younger riders might push through. Persistent fatigue after rides, trouble sleeping, or a lack of motivation could signal you’re overdoing it. On the flip side, feeling overly rested might mean you’re not challenging yourself enough.

Start by tuning in. Keep a simple journal for a week: note how you feel during and after rides, your energy levels, and your sleep quality. Write notes in your favorite training app, like TrainingPeaks or Strava.  If you’re dragging by midweek, you might need more recovery. If you’re itching to go harder, it’s time to dial up the intensity strategically. Prioritize sleep, hydration, and nutrition – especially protein and electrolytes – to support recovery, which becomes more critical with age.

Try This Today:
Log your energy and mood after your next ride. If you’re consistently wiped out, add an extra rest day this week.

Train With Precision, Not Guesswork

Smarter training means working with purpose, not just pedaling harder. Power-based training is a game-changer here. A power meter lets you measure your effort precisely, ensuring you’re training in the right zones to improve without overloading your body. For example, targeting VO₂ max intervals – short, intense 3-5 minute efforts at 106-120% of your FTP power – can boost your Vo2 max and FTP without taxing your system for hours. Follow these with equal rest periods to recover fully.

Structure your week with intention. Mix one or two high-intensity sessions with lighter spins or active recovery rides, like a 60-minute easy pedal at active recovery power (<56% of FTP). This balance builds aerobic fitness while preventing burnout. Periodization – cycling through phases of building power, endurance, and recovery – keeps your training sustainable. A simple plan might include a VO₂ max session on Tuesday, an FTP session on Thursday,  a hard and long ride on Saturday, and an endurance ride on Sunday.

Try This Today:
Plan one power-based interval session this week: 3 x 10-minute efforts at 95-105% of your FTP, with 5-minute recoveries. No power meter? Use perceived exertion – You will want to be at a “6” on a scale of 0-10.  Breathing hard, pushing hard but staying in control.

Fuel Smart, Ride Strong

Nutrition is your secret weapon. As you age, your body’s less forgiving about poor fueling. Skimp on carbs or electrolytes, and you’ll hit the wall mid-ride. Overdo it, and you’re sluggish. A continuous glucose monitor (CGM) can be a game-changer, giving real-time insights into how your body processes fuel. It helps you nail your nutrition – say, a mix of carbs and protein every 45 minutes on long rides – to avoid the dreaded bonk.

Even without a CGM, focus on timing: eat a carb-rich meal 2-3 hours before a ride and sip an electrolyte carb drink during. I use the UCAN products to help balance my blood glucose as they are slow absorbing carbs.  Post-ride, prioritize carbs AND protein within 45 minutes to aid recovery. One cyclist I coached started using a CGM, optimized their fueling, and shaved 10 minutes off their gran fondo ride time by avoiding energy crashes.

Try This Today:
Plan your next ride’s nutrition: pack a carb-based snack (like a banana or a UCAN sports bar or gel) and an electrolyte drink (Try “The Right Stuff” in your water bottle.) . Note how your energy feels compared to usual. Click this link for a SWEET discount on UCAN

For a discount on The Right Stuff use this link

UCAN

Leverage Data to Unlock Performance

Technology isn’t just for tech geeks – it’s your edge as a masters cyclist. Power meters track your intensity to keep you in the right zones. Heart rate monitors reveal how your body’s responding to stress. Even sleep trackers can flag recovery gaps. Do you know how your HRV is impacted by alcohol or a late meal?  These tools take the guesswork out of training, letting you fine-tune every ride for maximum gains with minimal strain.

For example, staying in your Zone 2 power range (65-75% of your FTP) for longer rides builds endurance without overtaxing you. Pair this with weekly reviews of your data to spot trends – like if your HRV is too high in the morning, signaling under-recovery. This data-driven approach ensures every pedal stroke counts.

Try This Today:
Review your last ride’s data (power, heart rate, or even just how you felt). If you achieved your goals in the workout, then continue to the next day.  If you failed to hit the watts, then take it easy. Adjust your next ride’s intensity based on what you learn.

Why a Coach Makes All the Difference

Training smarter isn’t about going it alone – it’s about having a plan as unique as you are. A coach can tailor your training to your goals, lifestyle, and fitness level, balancing intensity with recovery to keep you riding strong. At Peaks Coaching Group, we specialize in helping cyclists over 40 maximize performance with personalized, data-driven plans. Whether you’re aiming for a faster century or just want to enjoy every ride, we ensure you train with purpose and avoid burnout.

Ride Stronger, Longer, Smarter

You don’t have to trade your love for cycling for aches, fatigue, or frustration. By training smarter – listening to your body, using data, fueling strategically, and structuring your rides – you can ride stronger, longer, and faster, no matter your age.

Start by pinpointing where your training’s falling short. Our free Smart Training Checklist for Cyclists Over 40 helps you identify gaps in your approach in under 10 minutes.

→ Download the Checklist

Ready to take your cycling to the next level? Our personalized coaching and 30-day performance plans deliver a tailored roadmap to peak performance, designed for your unique needs as a cyclist over 40. Book a free consultation today and start riding with purpose.

→ Book Your Free Performance Consultation

Your Best Rides Are Ahead

Your 40s and beyond can be your strongest cycling years yet – if you train smarter, not harder. Try one micro-action today – like logging your ride’s energy or planning a power-based session – and download the free checklist to keep the momentum going. When you’re ready to unlock your full potential, Peaks Coaching Group is here to guide you to rides that feel as good as they did in your 20s, but smarter.To your strongest rides,


Peaks Coaching Group

The Ultimate Guide to Boosting Your VO₂ Max as a Cyclist Over 40

You’re halfway up a steep climb, legs burning, breathing hard, but the summit feels farther away than it used to. As a cyclist over 40, you’ve noticed the shift – rides that once felt like a breeze now leave you winded sooner, and recovery takes longer. It’s not your imagination; it’s biology. But here’s the exciting truth: you can fight back and ride stronger than ever by focusing on one key metric: VO₂ Max.

VO₂ Max – your body’s ability to use oxygen during intense exercise – is the engine behind your endurance, power, and resilience on the bike. While it naturally declines with age, targeted training can slow or even reverse that slide, keeping you fast, strong, and competitive. At Peaks Coaching Group, under the guidance of renowned coach Hunter Allen, we’ve helped countless cyclists over 40 elevate their VO₂ Max with smart, data-driven strategies that prioritize performance without burnout.

In this guide, I’ll unpack what VO₂ Max is, why it’s your cycling superpower, and how to train smarter to boost it – tailored for the unique needs of cyclists over 40. Most importantly, I’ll show you how working with Peaks Coaching Group can unlock your best rides yet. Ready to climb faster and ride longer? Let’s dive in.

Why VO₂ Max Is Your Key to Staying Strong

Imagine your body as a high-performance engine. VO₂ Max is the engine’s capacity – how much oxygen it can process during a hard effort. A higher VO₂ Max means you can sustain intense efforts longer, whether you’re powering up a hill, sprinting in a group ride, or pushing through a century. It’s the difference between fading early and finishing strong.

As you age, VO₂ Max naturally dips – about 5-10% per decade after 30 – due to changes in lung capacity, muscle efficiency, and cardiovascular health. In your 40s, you might notice slower recoveries or earlier fatigue. By your 50s or 60s, sustained efforts can feel tougher. But here’s the game-changer: with the right training, you can maintain or even increase your VO₂ Max, defying age and riding with the vigor of your younger self.

The key isn’t grinding out more miles or pushing until you’re spent. It’s training smarter with precision, data, and recovery – exactly what Peaks Coaching Group specialize in. Our 4-step framework – Assess, Plan, Train, Recover – ensures every ride moves you closer to your peak. Here’s how to start boosting your VO₂ Max today.

Listen to Your Body’s Cues

Your body’s talking – are you paying attention? As a cyclist over 40, you can’t ignore signals like persistent fatigue, sluggish legs, or trouble sleeping, which might mean you’re overtraining. Conversely, feeling overly rested could signal you’re not pushing hard enough. Balancing intensity and recovery is critical as recovery times lengthen with age.

Start by tracking how you feel. For a week, jot down your energy levels, leg freshness, and sleep quality after rides. If you’re consistently drained midweek, add an extra rest day. If you’re raring to go, it’s time to dial up intensity with purpose. Prioritize 7-8 hours of sleep and hydrate with electrolytes to support recovery – non-negotiables for masters cyclists.

Try This Today:
After your next ride, note your energy and mood. If you’re wiped out, schedule a light spin or rest day this week to recharge.

Power Up With Targeted Intervals

VO₂ Max loves intensity, but random hard efforts won’t cut it. High-intensity interval training (HIIT) is your most effective tool for boosting aerobic capacity. These short, focused bursts push your heart and lungs to process oxygen better, building your engine without overtaxing your body.

Here’s a simple plan: After a 15-minute warm-up, do 4 x 3-minute intervals at 115% of your FTP – think super hard and barely controlled, where talking feels nearly impossible. Follow each with 3 minutes of easy pedaling to recover. Cool down for 10 minutes. A power meter is ideal, targeting Zone 5 (VO₂ Max, 115% of your Functional Threshold Power, or FTP). No power meter? Aim for an 8-9 out of 10 on perceived exertion. Do this once weekly, and you’ll feel stronger in weeks.

Try This Today:
Schedule one VO₂ Max interval session: 4 x 3-minute hard efforts with 3-minute recoveries. Note how your breathing and power feel compared to usual.

Build a Rock-Solid Aerobic Base

Intervals spike your VO₂ Max, but long, steady rides lay the foundation. These 2-4 hour rides at 65-75% of your FTP (Zone 2, conversational pace) strengthen your cardiovascular system and improve oxygen efficiency. Think of them as the base of a pyramid – without them, your high-intensity work won’t hold up.

Plan one weekly Zone 2 ride at least 3 hours long, keeping it comfortable yet purposeful. Use a power meter or heart rate monitor to stay in Zone 2 (50-70% of max heart rate without power). This builds endurance without draining recovery. One cyclist I coached added a weekly 4-hour Zone 2 ride and boosted their FTP by 12% in two months, making long rides feel effortless.

Try This Today:
Plan a 3-4 hour Zone 2 ride this weekend at a conversational pace. Track your energy afterward to gauge its impact.

Fuel for Performance

Your body’s less forgiving about poor nutrition as you age, so fueling right is critical for VO₂ Max training. Before a ride, eat a carb-rich meal 2-3 hours out (like oatmeal with fruit and ground flax seeds). On rides over 90 minutes, sip an electrolyte drink and eat carbs (banana or UCAN energy gel) every 45 minutes to avoid bonking. Post-ride, eat a carb/protein mix – like a smoothie with carb/protein powder and berries – within 30 minutes to jumpstart recovery. Your goal is to have at least 2x Carbs to 1x protein and it can go up to a 4:1 ratio of carbs/protein.  This will optimize your recovery. 

A continuous glucose monitor (CGM) can fine-tune this, showing how your body handles fuel in real time. One cyclist we worked with used a CGM to optimize carb timing, avoiding energy crashes and cutting 7 minutes off their 50-mile ride.

Try This Today:
Plan your next ride’s nutrition: a carb-rich pre-ride meal, an electrolyte drink, and a post-ride protein snack. Note how your energy holds up.

Track Your Gains

Improvement requires measurement. A power meter tracks FTP over time – a rising FTP often signals VO₂ Max gains. Without one, monitor heart rate: sustaining harder efforts at a lower heart rate shows progress. Field tests, like a 20-minute FTP test every 6-8 weeks, can quantify gains. Even subjective wins – like climbing a familiar hill faster – matter.

Try This Today:
Compare your power for 20 minutes or similar effort on a familiar route to last month. Note improvements or areas to adjust.

Why Peaks Coaching Group Is Your Edge

VO₂ Max training is personal – what works for a 25-year-old sprinter won’t fit your life as a cyclist over 40. That’s where Hunter Allen, founder of Peaks Coaching Group, comes in. A pioneer in power-based training, Hunter has coached cyclists worldwide to peak performance with tailored, data-driven plans. Whether you’re chasing a personal best or just want to love every ride, Hunter’s expertise ensures you train smarter, not harder, balancing intensity with recovery to hit your goals without burnout.

Ride Stronger, Climb Higher

Your 40s, 50s, 60’s and beyond can be your strongest cycling years. You have to start now though!   By training smarter – using targeted intervals, building your aerobic base, fueling strategically, and tracking progress – you can boost your VO₂ Max and ride with power and confidence.

Ready to unlock your full potential? Book a free performance consultation with Hunter Allen at Peaks Coaching Group. He’ll craft a personalized, 30-day plan to skyrocket your VO₂ Max and transform your rides, tailored to your goals and lifestyle.

→ Book Your Free Performance Consultation with Hunter Allen

Your Best Climbs Are Ahead

You don’t have to let age steal your speed or stamina. Try one micro-action today – like planning an interval session or optimizing your fuel – and see how it feels on your next ride. When you’re ready to take your VO₂ Max to new heights, Hunter Allen and Peaks Coaching Group are here to guide you to stronger, faster, more exhilarating rides than ever.To your strongest climbs,
Peaks Coaching Group

Ride Strong at Any Age: How Cyclists Over 40 Can Avoid Burnout and Hit Their Peak

You’re out on the road, the rhythm of your pedals syncing with your heartbeat, the open horizon pulling you forward. But as a cyclist over 40, you’ve felt the shift. That post-ride soreness lingers a little longer. The high-octane sessions that once left you buzzing now leave you drained. And yet, your passion for cycling burns as fiercely as ever. The question isn’t whether you can still ride strong – it’s how.

I’m Hunter Allen, founder of Peaks Coaching Group, and I’ve spent decades coaching cyclists to their best performances, especially those over 40 who refuse to let age slow them down. The secret isn’t grinding out more miles or pushing through pain – it’s training smarter, with precision, recovery, and purpose. Burnout doesn’t have to be your story. In this guide, I’ll share how to navigate the unique challenges of cycling over 40, optimize your training, and keep climbing stronger, faster, and injury-free. Ready to make every ride count? Let’s dive in with a fresh perspective.

The Roadblocks of Age – And How to Outsmart Them

Cycling over 40 is like riding a familiar route with new terrain. Your body’s changing – muscles recover slower, VO₂ Max (your aerobic engine) dips 5-10% per decade, joints stiffen, and hormones like testosterone wane, making muscle-building and recovery tougher. These aren’t stop signs; they’re just new conditions to master.

I’ve coached cyclists who hit their 40s thinking their best rides were behind them, only to discover they could outperform their younger selves with the right approach. The mistake? Training like you’re 25, hammering every ride without enough rest. That path leads to burnout, injuries, and frustration. Instead, let’s flip the script – train smarter, not harder, and turn age into an advantage.

At Peaks Coaching Group, we use a 4-step framework – Assess, Plan, Train, Recover – to keep you riding at your peak. Here’s how to tackle the challenges of cycling over 40 and come out stronger.

Ride With Purpose, Not Just Passion

Your time is precious – work, family, life – so every ride needs to count. Chasing endless miles without a plan is like riding into a headwind with no strategy: exhausting and inefficient. Instead, set clear, specific goals. Want to crush a Gran Fondo? Outclimb your group? Or just savor every ride without feeling wrecked? Define your target, then break it into bite-sized milestones.

For example, if endurance is your goal, focus on one long, steady ride weekly. If power’s the aim, prioritize short, intense intervals. Years ago, I coached a 48-year-old cyclist aiming for a century ride. We built a plan with one weekly long ride and targeted intervals, and he finished stronger than ever – no burnout, just pride.

Try This Today:
Write down one cycling goal for the next 30 days – like shaving 5 minutes off a favorite route. List two actions to get there, like a long ride or interval session.

Make Recovery Your Superpower

Here’s a truth I’ve learned from coaching thousands of cyclists: recovery isn’t downtime – it’s where your strength is built. Over 40, your muscles need more time to repair, and skipping rest invites burnout or injury. I’ve seen riders push through fatigue, only to stall their progress. Smarter recovery keeps you riding strong.

Schedule at least one full rest day weekly – no guilt. On lighter days, try a 60-minute recovery spin at a conversational pace (Zone 1, 40-56% FTP). Sleep is non-negotiable – aim for 7-9 hours to support muscle repair. Wearables like a Whoop Strap, Oura Ring or Garmin watch can track recovery metrics like REM Sleep, deep sleep and heart rate variability, showing when you’re ready to push or need to ease off or make some change to your sleep hygiene.

Try This Today:
Add a recovery spin or rest day to your week. Check your sleep hours – aim for at least 7 tonight and look to get at least 1.5 hours each of REM and Deep Sleep.

Build Strength, Stay Supple

Age can stiffen joints and sap muscle mass, increasing injury risk. But you don’t need to be a gym rat to counter this. A little strength and mobility work goes a long way. Twice weekly, try bodyweight exercises like squats or lunges for leg strength and planks for core stability – key for holding your position on long rides.

Before rides, do dynamic stretches (leg swings, hip openers) to warm up. Post-ride, static stretches (hamstrings, quads, glutes) keep you flexible. Yoga or Pilates once a week can boost balance and posture, reducing strain. One cyclist I coached added 10 minutes of yoga weekly and cut their lower back pain, riding stronger for it. Try the “king of poses for cyclists”- the “Pigeon Pose” and stretch out that piriformis muscle on each side daily. 

Try This Today:
Do 5 minutes of dynamic stretches before your next ride – try leg swings or lunges. Note how your body feels afterward.

Harness Tech for Precision

Technology isn’t just a toy – it’s your edge. A power meter lets you train in precise zones, like Zone 4 (threshold, 91-105% of FTP) for improving your overall fitness or Zone 5 (106-120% of FTP) for power to improve your Vo2 Max. Measuring your heart rate shows you the “intensity of your intention” and can ensure that you are trying hard enough. Apps like TrainerRoad, MyWhoosh, TrainingPeaks Virtual or Zwift offer structured indoor workouts in each intensity zone..

Recovery tech, like an Oura Ring, tracks sleep and stress, ensuring you’re rested enough to train hard. I’ve seen cyclists use power data to avoid overtraining, boosting their FTP by 10% in months without burning out.

Try This Today:
Track your heart rate or power on your next ride. Stay in Zone 2 (69-83% of threshold heart rate) for a steady effort and see how it feels.

Fuel for Longevity

Nutrition isn’t just fuel – it’s your foundation. Over 40, your body needs balanced carbs, proteins, and healthy fats (not saturated!)  to sustain rides and recovery. Before a ride, eat complex carbs like pasta, brown rice, quinoa, or sweet potatoes  2-3 hours out. During rides over 90 minutes, take in 50-90g of carbs hourly (gels, bars, bananas) and sip a carb/electrolyte drink mix. Post-ride, a carb/protein mix – like a shake with whey and fruit – within 30 minutes aids muscle repair. Your goal is a 2:1 to 4:1  Carb:Protein ratio post workout shake, as this is scientifically proven to enhance glucose uptake and replenish glycogen storage faster.

Healthy fats (avocado, nuts) and omega-3s (fish, flaxseed) reduce inflammation, keeping joints happy. Hydration is critical – dehydration saps performance and recovery.

Try This Today:
Plan a ride with a carb-rich pre-ride meal and a post-ride carb/protein snack. Note your energy compared to usual.

Why I’m Your Guide to Peak Performance

I’m Hunter Allen, and I’ve dedicated my career to helping cyclists like you defy age and ride stronger. As the founder of Peaks Coaching Group and a pioneer in power-based training, I’ve coached athletes to podiums and personal bests worldwide. My approach blends data, science, and personalization to create plans that fit your goals, fitness, and life – whether you’re chasing a race win or just want to love every pedal stroke.

Ride Strong, Stay Vibrant

Your 40s, 50s, 60s, or beyond can be your best cycling years. Train smarter with purpose, recovery, strength, tech, and nutrition, and you’ll avoid burnout while hitting new peaks.

Ready to ride stronger than ever? Book a free performance consultation with me, Hunter Allen, at Peaks Coaching Group. I’ll craft a personalized, 30-day plan to optimize your training, tailored to your unique needs as a cyclist over 40, so you can crush every ride without breaking down.

→ Book Your Free Performance Consultation with Hunter Allen

Your Strongest Rides Are Ahead

Don’t let age dictate your performance. Try one micro-action today – like adding a recovery spin or pre-ride stretches – and feel the difference on your next ride. When you’re ready to unlock your full potential, I’m here at Peaks Coaching Group to guide you to rides that feel powerful, joyful, and stronger than ever.

To your strongest climbs,
Hunter Allen

Training and Competing with a Continuous Glucose Monitor – A User’s Guide for athletes and coaches

When I first saw a CGM being used by a cyclist, I knew I needed to try one and start to figure it out. Immediately, I was struck by how incredible the information about my glucose level could help me with fueling before, during, and after riding. The ability to see your glucose levels as you work out was a real game-changer. After the first month of using a CGM, I realized I needed to spend more time learning about it and conducting a thorough examination of glucose metabolism and its potential to enhance the lives of athletes and their performances. Three years later, I am still learning!

VeloPress agreed to publish the first-ever book on Continuous Glucose Monitors, and I am super proud of how my new book came out. Plenty of graphs to illustrate key points, enough science to keep it grounded, and hopefully an ease of reading that is approachable for everyone. It’s not a book about power meters or other secret tech item, but it’s a book about a game-changing wearable that every athlete can use to help them improve. Many coaches and athletes have asked me, “Why did you write a book on CGMs and I can’t believe it’s out already. So many people haven’t even heard of these yet…” Others have told me, “Way to go, another ground breaking book. You are doing exactly what you did 20 years ago with Power Meters, I’d better get this and start learning it.” It’s been fun to have some great feedback already with only a few copies getting out there (as of July 18, 2025-The book offically launches on July 22nd, 2025) and I look forward to even more feedback so that I can make the 2nd edition even better.

I have created a website for the new book. I will be teaching Master Classes in using a CGM starting in September. Have a look. www.TrainingandCompetingwithaCGM.com

Training and Competing with a Continuous Glucose Monitor book
Training and Competing with a Continuous Glucose Monitor by Author Hunter Allen

What can you learn from my new book?

  • How to understand what your glucose response is to different sports nutrition
  • How to best fuel before a workout or event to optimize your glucose.
  • What high intensity workouts and constant pace workouts do to your glucose
  • How to recognize the patterns of glucose drops and when to re-fuel.
  • How to re-fuel so that you do not create a reactive hypoglycemic crash.
  • Deternine the correct ratios of carbs/proteins/fats to ensure stable energy.
  • Learn if you have a problem with your glucose levels. Could you show signs of insulin resistance?

These are just a few of the topics that I cover in my new book. I have a chapter on how to use a CGM for Type 1 and Type 2 diabetics, along with a chapter that everyone will love: How to improve your longevity and vitality using a CGM.

From Chapter 1, “Training and Competing with a Continuous Glucose Monitor”.

In Figure 1.5, we have an athlete that has a normal glucose level while sleeping, down around 90 mg/dL. He then gets up and has a high-carbohydrate breakfast, which spikes his glucose to nearly 180 mg/dL, before it begins to dissipate. At lunch time, he goes out for a meal at a Mexican restaurant. He indulges in some chips; a large burrito filled with beans, rice, and veggies; and finishes it off with four small chocolates back at the office. This sends his glucose value to 200 mg/dL, possibly higher,and keeps it there for over four hours! Clearly, this athlete didn’t need this much fuel on board.

I hope you will enjoy my new book. If you would like an autographed copy, click this link

The AUDIBLE and KINDLE Versions are HERE

How, and how not, to use an indoor trainer in the winter

By Elite/Master Coach David Ertl

There are many reasons to consider using an indoor trainer in the winter – cold temps, snowy or icy roads, and darkness are the main reasons.  Riding outside is great and should be encouraged when possible, but there are times when riding indoors is a better option.

Some people avoid riding an indoor trainer as much as possible and would rather ride outside year-round. They may feel like they are building character (and bragging rights) by riding in frigid weather but how much character does one really need?  If it is cold, you are going to basically just be surviving on your bike ride outdoors and what training effect does that give you?  Yes, it will give you time in the saddle but are you really working on your fitness?  I find riding outside in the cold mentally draining. Not only does it take a long time to get dressed, but suffering through the cold, and dealing with numb toes and fingers takes mental as well as physical energy and I wonder what effect that may have on my motivation by the time summer comes.

On the other hand, I’m not a fan of doing endurance rides on the trainer.  90 to 100 minutes is about the limit for me.  Not that I couldn’t go longer physically, but mentally it is taxing. Again, I worry about the motivational implications of this down the road. To get in longer workouts in the winter, I’d encourage you to look for cross-training options:  If it’s snowy, consider cross country skiing or snowshoeing. If you can ice skate, that’s another option for using cycling muscles.  You can also go hiking, preferably on hilly terrain, in the colder months. In addition, in the winter I do more gym work on strength – both upper and lower body as well as core.  This substitutes for some of days I feel I need to do on the trainer.

Make sure your indoor setup is dialed. Fan, table, laptop, towel, kleenex, gels, sports drink. Check out the video below to learn how PCG founder, Hunter Allen sets up his indoor training room.

So, here’s my thoughts on how to use the trainer in the winter months. Now, all the training plans you read tell you to do low intensity, high volume in the early season and then shift to more intensity as the race season approaches.  But if you live in the north, that is really challenging. You can’t put in your long rides outside, and doing long rides on a trainer is torture. So, here’s an alternate idea.  Use the trainer for shorter, but structured rides where you are stimulating your aerobic system.  Instead of riding 3-4 hours in zone 2, ride tempo or sweet spot intervals for 1 to 1.5 hours on the trainer. You probably get more benefit doing this than surviving in the freezing cold in zone 2 for 2 hours. My rule of thumb is that if you can’t get in at least 2 hours outside, you are better off doing an hour of structured work indoors where you can get some cardiovascular training accomplished.

An indoor workout like this 30 sec at 120% of FTP and then 30 sec at 60% of FTP is a great workout to enhance your neuromuscular power (L7) and also touch on your FTP(L4). Plus, it’s fun and the time goes by quickly!

If you want or enjoy longer rides, especially with the apps like Zwift, My Whoosh, Rouvy or Training Peaks Virtual, you can certainly do so, but I’d caution you to only do those when you are motivated and want to do them.  It’s certainly possible to do rides of 2 or more hours indoors but I would caution against doing these too often. I recall the first time I did a smart trainer ride; I rode up Mt Ventoux on Rouvy and rode for 3 hours.  It was new, fun and interesting but I haven’t done it since.

Indoor training is especially good for doing structured workouts, especially if they are fairly complex with changing interval lengths and intensities.  Structured workouts combined with a smart trainer do the thinking for you and you can just concentrate on doing the work.  You can do the intervals without the distraction of vehicles, stop signs, hills or wind.  You can do them the same every time and compare with your previous efforts.  You can incrementally increase the efforts of your workouts by a couple of watts each time, something that would be very difficult to accomplish on the road.

But something to keep in mind – indoors trainers give you a different sensation than riding on the road.  For one thing, you may not realize how much you change power on the road and how much coasting you do outside (unless you study your power files, which you should do), and how much you move around on your bike riding outside vs staying very stationary indoors.  Indoor training doesn’t do anything for balance or bike handling, unless you ride rollers.  And the power and muscle dynamics are different on a trainer.  You don’t get the same effect of momentum indoors.  When riding outdoors, when you stop pedaling or ease up, you keep moving and slow down gradually. On a trainer, if you stop pedaling, you stop within a few seconds.  On a trainer you are always pushing against resistance as if you were riding uphill.  Additionally, because you don’t have the same momentum, your pedal stroke is different. You don’t have the same ability to keep momentum of the pedal stroke, especially through the top and bottom dead spots of the pedal stroke.  This causes the muscles to work differently. And finally, riding in ERG mode on a smart trainer is a wonderful thing in terms of forcing you to keep a constant power output, but again it is different from pedaling outside. Outside, if you get tired, you may downshift, and your speed and power will drop. In ERG mode, if you get tired the trainer doesn’t let your power drop so what happens is you slow your cadence, but because the power resistance doesn’t change, this causes you to put out more force per pedal stroke at a slower cadence.  If this keeps up, you get into a downward spiral, sometimes quite quickly, where you can’t keep up the RPMs, so the resistance gets harder, which causes you to slow your cadence even more and before you know it you are dead in the water.

The blue dots show this cyclist’s cadence is too low on the indoor trainer. The vertical line is 90rpm, so they are between 60 and 85 the whole time. This is the result of the indoor trainer having load across the entire pedal stroke. Get that cadence UP over 85rpm!

In summary, indoor trainers, especially with the advent of smart trainers and training apps, have become a valuable and useful tool for training indoors.  Use indoor training to focus on specific power development but realize they aren’t a perfect replacement for outdoor riding. So use indoor trainers wisely and judiciously, balancing indoor training with outdoor training when possible.

Connect with Elite/Master Coach David Ertl this season. He still have a few openings for coaching and/or consulting. Finish your next event with energy to spare AND feel good doing it!

Cycling is the Fountain of Youth – or is it?

By PCG Elite/Master Coach David Ertl

Ever since Ponce de Leon’s time, people have been searching for the fountain of youth.  Little did they realize it was sitting right in their garage – their bicycle!  Cycling certainly can give us many of the attributes we seek in youthfulness – aerobic, cardiovascular, and muscular fitness, maintenance of our body weight and composition, metabolic health, a healthy blood lipid profile, and glucose levels. The exercise cycling may help prevent chronic diseases, obesity, cancer and neurological disorders.

First and foremost, cycling is an aerobic endurance sport. It generates tremendous aerobic fitness which trains the body to be more efficient at burning fat as well as sugar, modulating blood sugar levels.  It creates a stronger heart, increasing stroke volume and pumping out more blood per beat, often resulting in lower resting heart rates.  Aerobic training can improve blood lipid profiles (triglycerides and cholesterol) as well, aiding in better cardiovascular health.  It’s been observed that the best indicator of longevity is one’s VO2 max capability. VO2 max is improved by training at close to one’s maximum aerobic capacity, which would be in Zone 5 in the 6 zone models (106-120% of FTP).

In addition, cycling can also improve our anaerobic fitness. As one exceeds their aerobic capability, the body relies on glycolysis and glycogenolysis to break down glucose for short-term energy. This allows us to function at very high levels for short periods of time, not only for chasing breaks or sprinting in races but also for running up a flight of stairs or across a busy street.

Cycling is obviously good for lower body strength. Just look at any high-level cyclist, and they have tremendously developed leg and glute muscles from pedaling the bike thousands of reps per ride. Grip strength is another strong indicator of longevity, and while I don’t believe grip strength will necessarily save one’s life, I think it’s a proxy for overall strength. One can’t pull hard on the handlebars or lift a barbell without commensurate grip strength.

Because cycling is an endurance sport, cyclists tend to be leaner than the general population in part due to the many hours we can train each week.  A good workout for a runner may be an hour a day, and while a marathoner may run for 3-4 hours at a time in a marathon, they can only run a marathon a few times each year, whereas a cycling can ride 5-6 hours in one day and turn around and do it again the next day (if in shape for it). This allows cyclists to burn thousands of calories per ride daily and develop great endurance. Obviously, the intensity of riding for 5 hours is less than a marathoner runs, the total calorie burn can be greater for the cyclist.  This results in a good body composition with a healthy BMI and body fat percentage if their nutrition is also dialed in.

All these benefits, aerobic and anaerobic fitness, strength, blood, and body composition, are favorable for living a long and healthy life.  On top of all these benefits, cycling is also fun. Many of us would do it even without these health benefits. I certainly didn’t even think of health when I started cycling competitively as a teenager, although now that I am older, I think about it much more. Unlike some forms of exercise, cycling gets us outdoors, allows us to ride places under our own power, and can be very social. 

So, is cycling the fountain of youth?  It sure sounds like it, but it isn’t quite the complete answer.

The aerobic and anaerobic benefits of cycling are hard to beat, but what about strength?  Yes, cyclists have great leg strength. But what about the rest of their body?  If we don’t consciously work on core and upper body strength, cycling isn’t going to help there.  Have you seen professional cyclists unzip their jerseys?  Their upper body looks like a marathoner – skinny and even gaunt.  Now, they get paid to be extremely light, but that isn’t necessary for the rest of us and certainly isn’t healthy.  We should want balanced strength across our whole body to facilitate functionality as we age.  So, we should do other exercises that foster strength above the waist (e.g., rowing, cross-country skiing), or do intentional strength training with weights or body weight, or both!

And what about bone health and density – do you think cycling does anything for that?  If anything, cycling may negatively affect bone strength as some cyclists have been diagnosed with osteopenia or osteoporosis.  Bone strength results from either impact or stress on the bones from the muscles doing resistance work. Because cycling is not a weight-bearing exercise, our bones don’t get the benefits that a runner does from repetitive impacts.  It’s also suspected that the excessive sweating a cyclist does for hours on end may leach calcium from our system, potentially weakening our bones.  The solution is to incorporate some ground-based exercises (jumping, running) into your routine or do strength training.  Strength training not only helps muscle mass and strength, but when muscles pull on tendons, which pull on bones, that creates stress, signaling the bones to get stronger.

And finally, just because we as cyclists can be extremely fit human beings, it doesn’t automatically translate into being extremely healthy. It can, but only if we also live a healthy lifestyle and care for ourselves in other dimensions such as nutrition, cardiovascular health and chronic disease avoidance.  For example, because we burn so many calories, we also eat a lot more calories.  If we have a poor diet that means we are eating a lot more low-quality food which can be injurious to our bodies (e.g. highly processed foods). As Hunter Allen often says, “You can’t out exercise a bad diet!”.   Quick energy is useful on long rides but shouldn’t be our main source of calories once off the bike.  And just because we ride our bikes a lot doesn’t mean our cholesterol, triglycerides and blood sugar numbers are in order. Understand your numbers and address them if they aren’t where they should be. In other words, care for your health as if you didn’t cycle.

Bottom line: Cycling is as close to a fountain of youth as almost anything, but it’s not the complete picture.  We need to tap into these other fountains (strength training, nutrition, healthy lifestyle) to round out our health as well as our fitness.

Author David Ertl has been a coach for Peaks Coaching Group for over 10 years.He’s written extensively on many subjects and has raced in at least one bike race every year for the past 50 years! David is always looking for new clients, and if you are interested in working with him, send us an EMAIL.

Training on Purpose: What’s the benefit of short zone 2 rides?

By Peaks Coaching Group Elite/Master Coach, David Ertl

https://www.peakscoachinggroup.com/DavidErtl

I’m seeing a lot of interest in Zone 2* training lately, not only from cycling training circles but also from the longevity and aging sectors. Cyclists have long known the benefits of Zone 2 training for building aerobic capacity and endurance.

One of my favorite graphs from the book ‘Training and Racing with a Power Meter’ by Hunter Allen et al, is Table 3.2, shown here:

This chart shows the physiological adaptations from training in each of the 7 zones.  Zone 2, also called the Endurance zone, is useful for building aerobic capacity and endurance, things like increased capillarization, mitochondrial function, fat metabolism and conversion of Type IIx (fast glycolytic) to Type IIa (fast oxidative) muscle fibers. If you are training for a long-distance event, there is no substitute for doing long steady Zone 2 rides, sometimes also referred to as LSD (Long Steady Distance) or base miles.

To elicit these above-mentioned adaptations requires long hours in the saddle. The intensity is low, so the benefit comes not from the intensity but from the time spent at this intensity. The benefit from Zone 2 training is achieved by fatiguing the aerobic system, which takes time. How long depends on one’s fitness.  For a beginner, an hour may be considered long, but as fitness builds, the required length of these rides also increases.  For a very fit cyclist, it may take four or more hours to begin to elicit the stress necessary to improve on these adaptations. As the type I fibers become fatigued over time, the type II fibers are recruited to assist, even though the intensity hasn’t necessarily increased.

According to this chart, it requires at least 2.5 hours of Zone 2 training to begin to accumulate enough stress to generate the Zone 2 adaptations mentioned above (again, depending on your fitness level, someone that regularly rides 2.5 hours probably will need 4-5 hours of riding to improve their endurance).  This raises the question as to whether there is any value in doing shorter Zone 2 rides as you increase your fitness levels.

I’ve heard the argument that short Zone 2 rides can be used to add volume and stress to one’s training schedule. But if you want to build volume and have an hour, why not do something that will generate more stress and elicit some real benefit, such as Zone 3 or above work?  If you just want to loosen the legs, then why not do an hour of Zone 1 recovery work? Zone 2 rides probably won’t elicit much of the desired training effect if they are too short to generate fatigue. Then one needs to assess what the goal of that training session really is.

‘Junk miles’ is a common term to describe rides that add fatigue but don’t generate enough of a training effect to warrant this fatigue. Junk miles have traditionally been called ‘no-man’s land’ training, which is now considered to be Zone 3.  The argument was that this is not hard enough to generate significant stress but generates fatigue.  This argument is used today by those in opposition to sweet spot training. But refer again to the first chart above and see the many benefits that can accrue from Zone 3 training, again assuming the duration is long enough to elicit these benefits. These are at least as good as the benefits that come from Zone 2 training, and in some aspects better than Zone 2. 

As I’m creating training plans for my athletes, every workout I put in the plan has a purpose.  Whether it’s for endurance (Zone 2), FTP (Sweet Spot or Zone 4), anaerobic capacity (Zones 5 and 6), or simply recovery (Zone 1), there is a reason for including these workouts. My definition of ‘junk miles’ is a little different from that above: junk miles are any miles that are ridden without a purpose. So, this brings us back to the question of what to do when one only has a hour to train.  Well, according to the second chart above, that indicates that the work should be in Zone 4 or higher to elicit some benefit during this duration.  Or if you don’t want to work that hard, then I’d recommend just doing an hour or less of Zone 1 recovery work. Doing an hour of Zone 2 or low Zone 3 isn’t likely going to add any physiological benefit but will only add fatigue. Now, if the purpose is to add fatigue, then maybe that’s acceptable, but just realize you aren’t really going to achieve any substantial training benefit other than fatigue development. What if you say you just want to go out and burn some calories, isn’t an hour of Zone 2 good for that?  Well, yes, but you can burn even more calories riding in Zones 3 and above if that is your objective. What if your purpose is to go out and have a fun, relaxing ride? I do this on occasion, and it is good for the mind and the soul. If you happen to want to ‘just ride’ and enjoy yourself and want to ride a little harder than Zone 1, then you’ve achieved that purpose by doing a short Zone 2 ride. The point is to make sure you know what your training objective is for each ride and then do the ride that accomplishes that. But also realize the limitations of each type of ride in terms of the training benefit.

David has been a long time coach with Peaks Coaching Group and has an impressive list of results.

To contact David, please send an email to info@peakscoachinggroup.com with your questions.

51 years of cycling racing and training experience!!!

23 years of cycling coaching experience

Author of four cycling training books

Obtained NSCA Personal Training Certification

Official coach of RAGBRAI

1st place RAAM 60+ 4-person mixed team 2023

Served as National Coach for JDRF Ride to Cure Diabetes

1st Place Race Across the West, 60+ 4-man Team

Connecticut State Road Championships, Junior, 2nd

Iowa Mountain Bike Championships, 35+, 1st

Iowa Time Trial Championships, 40+, 2nd

Podiums in master events in road, time trialing, cyclocross, and mountain biking

What is the optimal number of intervals?

One of the many reasons to train with a power meter has to do with determining optimal training load.  Should I ride two hours today or four hours?   Should I do intervals or just ride easy?   Are ten hill repeats enough or would fifteen make me even stronger?  How many hours or miles should I ride this week?    Does more always equal better? These questions are asked daily by triathletes all over the world and all of them are legitimate and valid questions to ask each month, week and day, or even after every hill repeat.    There are elaborate schemes on how to periodize your training based on miles, hours, racing category, age and even your geographical location.  Some are based on heart rate, some are based on mileage, and even others are based on goals and available hours to train.  All are designed to answer the same question:  How much is enough?   

I think Joe Friel said it best in “The Cyclist’s Training Bible”, when he wrote, “An athlete should do the least amount of the most specific training that brings continual improvement.”  If you can win the race with ten Vo2 max intervals then why do twelve or fifteen?   I remember reading this when his first edition came out and thinking it was flawed in the fact that I didn’t have a way to really know how much was enough?   I mean, I love riding my bike just like the next guy, and I will ride extra miles just because it’s fun, not because it’s ‘just enough’ to give me the win on Sunday.  At the same time, I agree that riding ‘just enough’ is the right way to think about training for success,   but in my mind it was only a guess as to how much training stress  you needed in order to give you the fitness needed to win.  Since this was just a guess, and being the ever ‘over-achiever’, if I think ten- Vo2 Max intervals are what I need, then I am going to do twelve or fifteen just to be sure.

Enter the dawn of the bicycle data acquisition device- the power meter.   With a power meter, you can record every effort, every ride, every race, quantify your exact training load or ‘dose’, and then you can watch your progress to learn your training ‘response’.    The ability to understand how you respond to training stimulus is paramount to answering the question: How much is enough?   If you do ten Vo2 max intervals two times a week for a total of eight weeks before your key event, and then see that your Vo2 max power has increased by 30%, you’ll know that the training worked. Conversely, maybe you only do those intervals one time a week and in eight weeks see no difference in your Vo2 max power, or maybe you do them for ten weeks and your Vo2 max power didn’t increase significantly after week eight.

Before we consider the ‘big picture’, we need to first examine the training needed to be done daily.   In order to do this we need to understand the relationship between intensity, time and the energy system we are trying to improve.  For our first example, let’s say that Joe Triathlete wants to work on his Vo2 max power.  From the good Doctor Coggan’s training zones; we know that Vo2 Max is stressed when you are between 106 and 120% of your functional threshold power or FTP.   So, the intensity must be in the correct training range in order to cause enough stress on that energy system, in this case the Vo2 Max, for it to stimulate improvement.  At the same time, the duration of that effort must be long enough to stress that energy system.  If you rode at 120% of FTP for only thirty seconds, then that would not be long enough to actually cause it to adapt.  For the Vo2 Max system to adapt to training stimulus, a minimal effort for 3 minutes is necessary with a max time length of about 8 minutes.  After 8 minutes, it’s very hard to maintain if not impossible for most people at 106-120% of FTP.   So, once you understand the relationship between time and intensity, it allows you to set some guidelines about how many intervals are optimal to do on a workout basis.   For instance, since you are trying to improve your Vo2 Max system  and you want to prepare for an upcoming triathlon that has (8)  five minute climbs in it, then you are going to do (8) x 5 minute intervals between 106-120% of FTP(let’s use 300watts in this example).  The first interval you do, you crack out 360 watts, the second is 350, and the third is 340. This third interval is what I call the ‘repeatable’ interval.  The watts that you do in that interval are the watts that you can ‘repeat’ over and over for multiple repeats.  The first two efforts are always the ‘fresh’ efforts in which you have plenty of glycogen in your muscles and you also have a lot of anaerobic work capacity available to crack out the big watts.  However, once that anaerobic work capacity is used up, then you are left with just the right amount of energy to repeat more efforts.  The reason this is so important is that we are going to take the watts in the third effort and subtract 5% from it (in this case 340 x .05=17 and 340-17= 323 watts), and when you can’t average at least this many watts (323) for your interval, you are going to stop as now you are not training intensely enough in order to elicit a great enough stress to cause a training improvement or adaptation.    Maybe the sixth interval is 320 watts and because you are an ‘overachiever’ (aren’t we all!?) and you want to make absolutely certain that you are cooked, you do one more interval but by minute two, you see that you can’t even maintain 310 watts much less over 320.  This immediately lets you know that you are now below the intensity needed to stimulate the Vo2 max system and you can’t maintain the time needed to create enough stimulus for improvement.

 In reviewing my interval guidelines above, they can help you to understand exactly when to stop doing interval repeats based on that ‘ever telling’ third effort.   Of course, this requires a bit of mental math out on the training ride, but as long as you know the percentage drop-off to look for in each time period, then you should be able to quickly and easily figure out how many intervals are optimal for each workout.

In the example below of an athlete’s Vo2 Max workout, we see the other side of the coin and in this case, the athlete could have done more intervals to gain even more training adaptation.  This is a perfect example of using these interval guidelines to ensure optimal training.    This athlete’s watts didn’t drop at all from third interval to the first one, they actually went up!  Unfortunately, he stopped after the fifth interval, when he could have easily done another, if not two or more.

Since we are all limited by the time we have to train and we want train most efficiently, it makes sense to use your powermeter to figure out your optimal number of training intervals for each workout.  Not only does it make sense, but it now allows you to take advantage of using Joe Friel’s Maxim, “Train just enough for success”.    With a powermeter, we have now been able to quantify the optimal training load in the grand scheme, and also using some simple guidelines, you can truly optimize your training each day.   We are all limited by our ability to recover and our abilities to adapt to training stress, so that will always be a limiter in our fitness improvement. However, wouldn’t it be nice to improve at the highest rate that you can?   Of course, it would and now using my interval guidelines to help you, you can be assured that you are training optimally.  As a coach of all kinds of triathletes, from Kona winners to sprint distance age groupers to recreational enthusiasts, I use the powermeter to its fullest to make sure my athletes train optimally.   This is the key for each and every athlete, train to your optimal level and you’ll be assured of success.

To read about this concept even more in depth, read about it in Hunter’s Book, “Training and Racing with a Power Meter”. You can get a copy here.

Hunter Allen has online training programs available at TRAINING PLANS – Shop Peaks Coaching including great plans to make your summer better than ever. Peaks Coaching Group has over 35 coaches that can help you no matter your fitness or goal. We can help you improve in triathlon and cycling. If you are interested, you can contact Hunter directly www.PeaksCoachingGroup.com for an interview about personal coaching, camps, consulting, nutrition and more. Be sure to follow the Peaks Coaching Group Facebook page for great training tips.

The 20-minute test is NOT YOUR FTP!

by Hunter Allen

Conducting an FTP test isn’t merely a measure of sheer power output; it’s a strategic protocol designed to reveal an athlete’s physiological capabilities accurately.  To truly know your FTP, then you must do a 60-minute time trial on the bike that you compete on.  This is the gold standard. The actual definition that Dr. Andrew R. Coggan and I wrote in 2002 is: The highest power a rider can maintain in a quasi-steady-state w/o fatiguing. When power exceeds FTP, fatigue will occur much sooner, whereas power just below FTP can be maintained much longer. This is roughly a 60-minute test.   A 60-minute test is not easy because it requires that you push yourself on the limit for a full hour, you must have the muscular fatigue resistance to withstand a constant power at your physiological limit, and you must be mentally prepared for the physical demands of the effort as well.   Finding a suitable course over which to do the 60-minute time trial can also be problematic, as many of us don’t have access to an hour-long steady climb or flat, safe road without stop signs or other distractions.   Therefore, I came up with a “Short-cut” to the 60-minute test.  This short cut was designed to allow the rider to get close to their 60-minute FTP number without having to do a full 60-minute effort.  It’s not perfect and is only meant as a “point of triangulation” to find your true FTP.   This test has become very common and is known as the 20-minute test.  If you decide to do this “shortcut” test, then it’s VERY important that you do the entire protocol.  Most riders will skip the initial 5-minute test that is done before the 20-minute test, and this is a mistake.  Without doing the 5-minute test, your FTP will be overestimated. 
The 20-minute “short-cut” FTP Test.

Preparation: Prior to the test, ensure adequate rest and hydration.  You should do your test at the end of a rest week, so that you are rested from the previous training block and will feel fresh and strong, so that you may do your best effort. Warm up thoroughly, gradually raising heart rate and preparing muscles for the impending effort. 

Warm-up: 20-30 minutes at Endurance pace.     During this part of the warm-up, do (3) x 1 minute fast pedaling drills.  These are at low wattages, but a cadence between 100-120rpm, so that you can get the muscles contracting and relaxing quickly, heating up the muscles but not taking away from their ability to produce high sustained forces.

Do a 5-minute “blow-out” effort after your warm-up.   This is a “hard as you can go” for 5-minutes.  Your power should start over your FTP (at least 115% if you kinda know what your FTP might be to begin with) and then your power should slowly fall throughout the 5-minute test, only rising in the last 30 seconds as you give it your all to the finish line.   The reason for this test is to exhaust your anaerobic work capacity. You need to reduce your anaerobic freshness, so that there is a touch of fatigue in the legs when you begin the 20-minute test.  This fatigue will ensure that your 20-minute average wattage is closer to what your actual 60-minute test might be.    Rest for only 5 minutes before you begin the 20-minute effort.

Begin the 20-minute test segment at a sustained effort level, aiming for the highest consistent power output possible within this timeframe.  DO NOT START TOO HARD!!!!  You will Maintain focus, pacing, and mental fortitude throughout and pick up your pace in the last 5-minutes.

Important tips:  1) Be sure you “calibrate or zero” your power meter before your test.   2) Ensure that your bike computer is set on “1 second recording rate” so that you capture the highest level of data.  3) Try to do this on a course which you can repeat every 8 weeks.   4) While doing your test, you will want to see:  power (3 sec. average), power (10 sec. average), cadence, heart rate on your bike computer screen.   

Everest Base Camp and More– Off-season Training!

LOTS OF PICS !!!

During the off-season, we all do many things, some of us just rest and get those home projects done that have been neglected all year, others do some different type of exercise like running, roller blading and strength training. For others it’s a chance to do something completely different and take a break from cycling. For me, I had a huge year of cycling and my tan lines were sharper and deeper than they have been for over the past 20 years. That was a lot of amazing “smiles” this year. However, I was ready for a different stimulus. For years, I have been dreaming of going to Nepal and seeing the Himalayan mountains. From boyhood dream to reality at age 54, I was beyond excited to book a 21-day trek with Highland Expeditions in Kathmandu. Not only was my most amazing adventure partner, Diane, going on this trip, but she was up for the challenge, super fit and probably going to kick my butt! (she did!) Everest Base camp is at 17,589′ and while Diane and I had never been to that elevation before, we did race in the Machu Picchu Epic MTB race in Peru a couple of years ago and every stage was between 11,000-14,000′ and we did fine with the lack of partial pressure of oxygen.

We knew from our experience in Peru that we needed to pre-acclimate with a week at higher elevations, so after a full summer of getting in some longer and longer hikes (between bike rides), we headed to Colorado to spend a week camping and hiking at 10,000+ feet and we even summited the highest “14er” in Colorado at the end of our week, Mt. Elbert.

Summit of Mt. Elbert, Colorado 14,440′

A rest week and then a week of intervals followed to maximize our red blood cell growth and then off to Nepal we went, still with a little interval fatigue in our legs! From Kathmandu, we opted to fly by helicopter to Lukla, which is the start of the Everest Base Camp Trek. Many times, the planes can’t land at the Lukla airport because of poor visibility, but helicopters can just fly around those clouds! The “most dangerous” airport in the world and the runway is a 12% gradient! Imagine landing and taking off in a plane on one of those steep sections of road that you have ridden you bike up! Watch the take-off video below. Skip forward to 2:00 where the helicopter lands and then the plane takes off… CRAZY.

Fast forward to 2 minutes in. Lukla Nepal…. Sir Edmund Hillary Airport.

We started our trek with our guide Prashant Basnet from Darjeeling, India and our Porter, BB, who lives “two days walk” below Lukla. BB carried most of our gear, which included sleeping bags, clothes, hand warmers, extra food, toiletries including toilet paper (bring your own!). We each had a limit of 25lbs, so BB was carrying our 50lbs of stuff and his own gear which was basically a small daypack. Prashant carried his own pack which was about 30lbs. We each carried day packs as well, which were about 18lbs each. Clearly us westerners don’t understand what it means to go light! This was a 16-day hiking trip, so while BB never changed his clothes the whole time, we decided that we’d like at least 3 changes of clothes!

BB!!! He weighed 125lbs and carried like 60lbs!!! HE WAS A MACHINE.

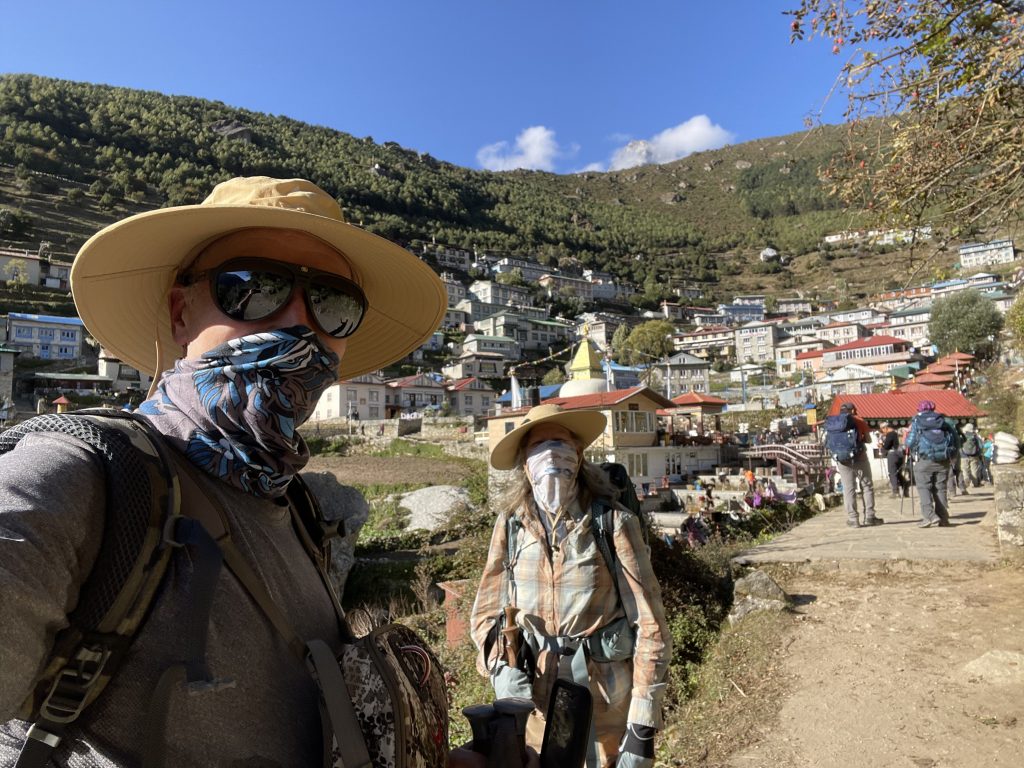
We cruised to the famed Namche Bazaar village and spent two days, three nights there to acclimate to 12,000′. What an amazing place! The main village in the Himalayans and it was just magical to be there. It also gave us our first view of Mt. Everest!

Our First sighting!!!!!!! That’s Everest!!!!

Namche Bazaar! The Rudy Project Star Dash glasses were critical to protect our eyes from the high elevation rays and all the dust and junk on the trail. Grab a pair at a serious discount. Use the link here and make an account and you’ll get a big discount on any Rudy Project product.

That’s Everest over my right shoulder. Ama Dablam in between us.

We chose a trek that was longer than the traditional up to Everest Base Camp and back, which is typically 10 days. We had 3 weeks to play with, so we chose to trek to the beautiful Gokyo Lakes at 15,000′ and also summit the Gokyo Ri peak (17,500′) which is a small peak just above the Gokyo lakes village. That was an amazing day and both Diane and I were super strong all day, setting fast paces to Gokyo Lakes and then we felt strong all the way to the summit. No headaches, dizziness, nothing. Amazing views of Everest, Cho Oyu and many peaks in Tibet (China). Spectacular.

The Emerald Green of the Gokyo Lakes

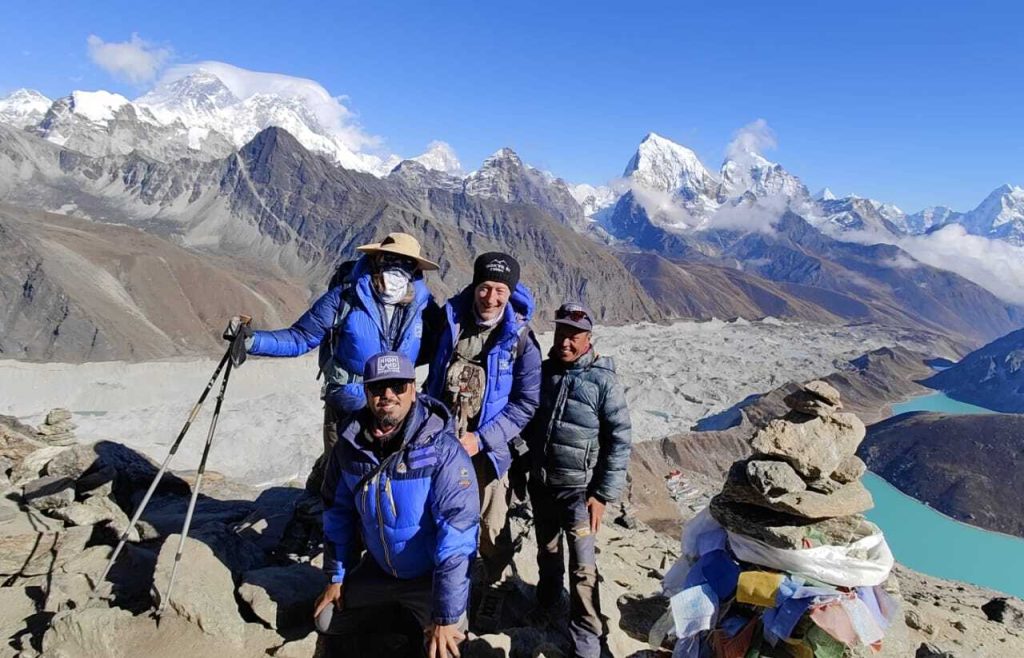
Summit of Gokyo Ri with Everest in the background, Gokyo village is visible to the left of the cairn. That’s the Ngzoympa Glacier behind us. The longest Glacier in the world. It’s covered in rocks! Prashant, kneeling and BB also crushed it up the climb!

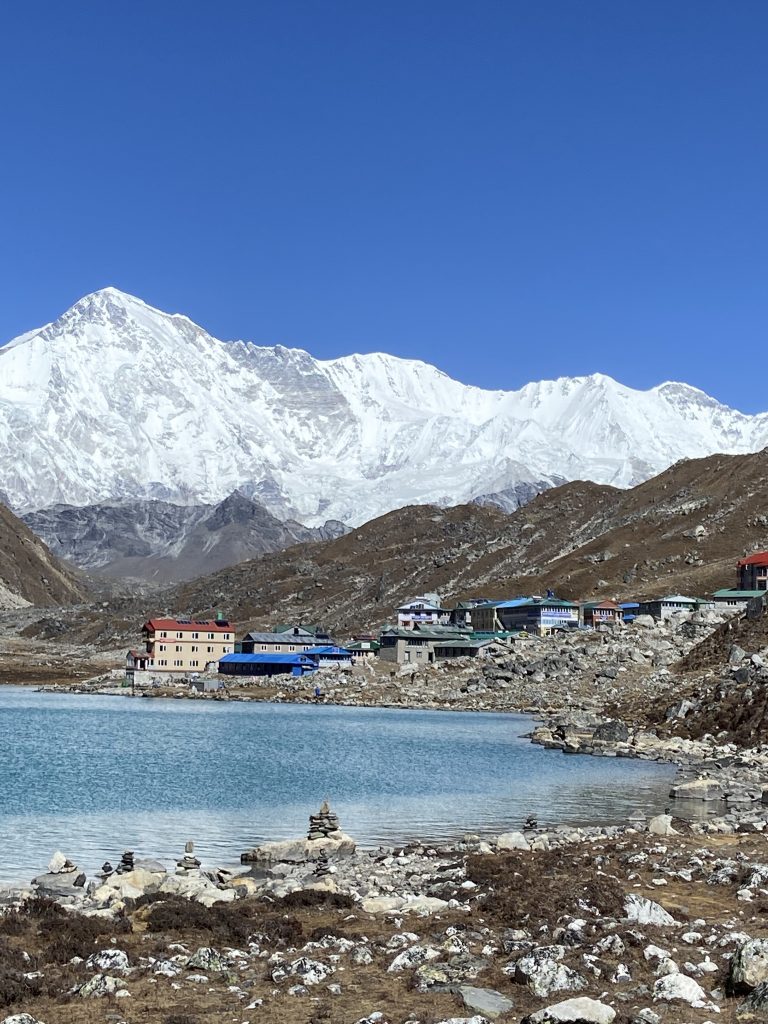
Gokyo Lake and Village with Cho Oyu in the background.

From there, we climbed up and over the Cho La Pass at 17,780′ , which is just an amazing hike up and over the pass. It took about 2.5 hours to get to the top and then we put on micro-spikes for the hike down the glacier on the other side.

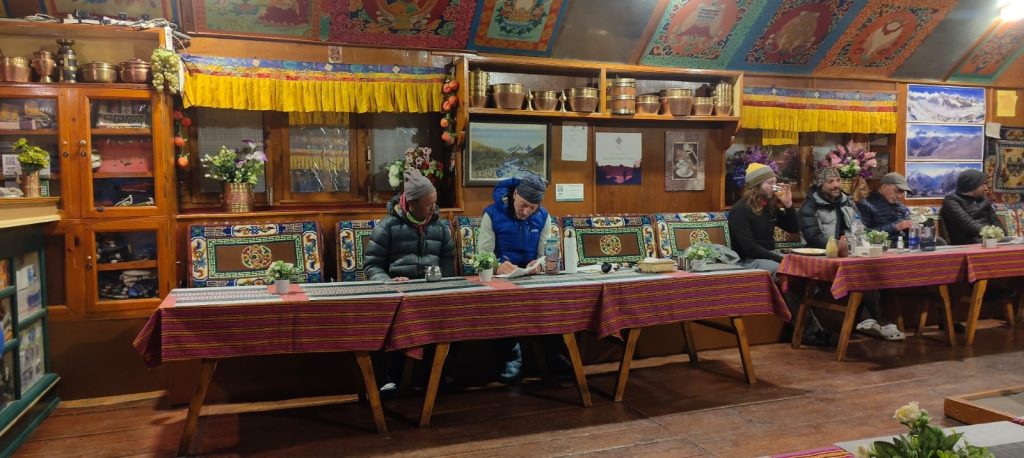
That night, we stayed in a small village called Dzongla and it was cold! (Below freezing in the room). The places you stay at along the way are called Teahouses and they are basically hotels with a common dining room and then small rooms for everyone. The walls are plywood (bring your earplugs), there is no heat and only electricity as long as the batteries are charged from the solar panels. The bathrooms are rough most of the time, being “Squat” toilets, which means there’s a hole in the floor and you squat over it. Be sure of your aim! A few of the teahouses we stayed at were luxury teahouses and they were truly nice. In room bathrooms with actual toilets, hot showers, electric blankets and electrical outlets to charge our devices. The Mountain Lodges of Nepal were pretty darn awesome, I must say. We stayed in this one, while in Monjo. Lodge in Everest Region I Mountain Lodges of Nepal

The inside of a typical teahouse. This one was in Machermo, on the way to Gokyo. BB is teaching me some new words in Nepali. We set a goal to learn 100 words in Nepali while we were there. We ended up learning nearly 300 and could even speak some phrases much to the amazement of some locals. 😉

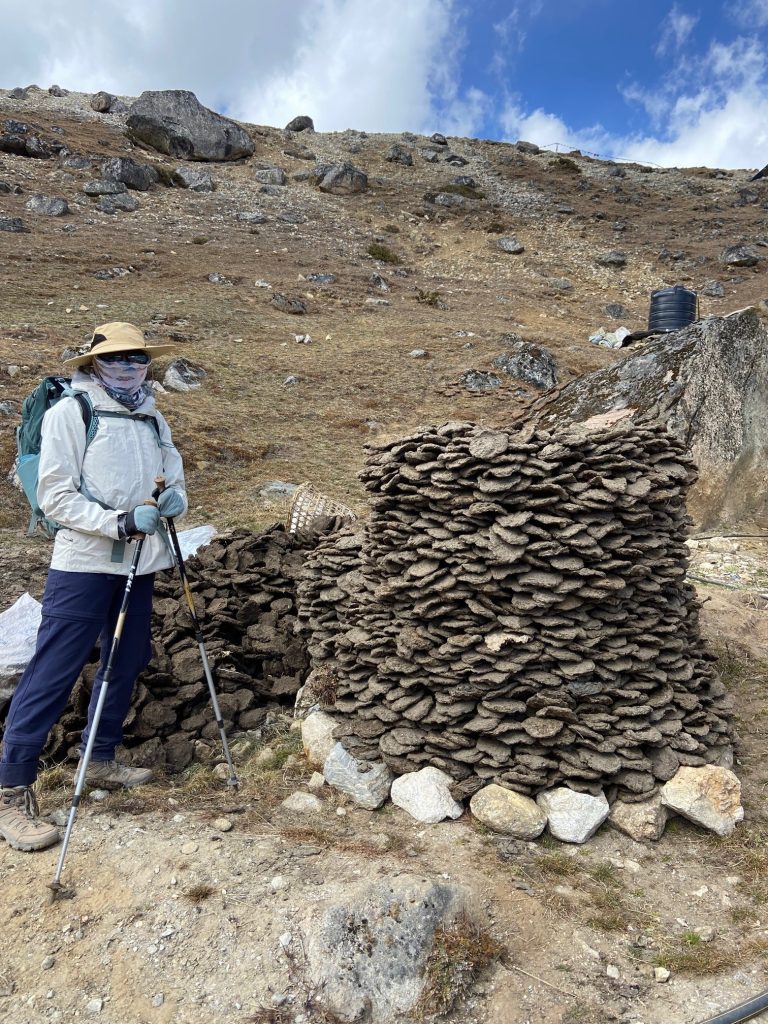
The only thing that is heated in the teahouses is the main dining room. There is a “wood” stove in the middle of the room that is fired up every day at 4pm-ish. Wood stove you ask? Where do they get the wood from? Well, there is no wood up here! The fuel is Yak Poo! Yes, Yak Poo. There are “Yak Poo Hunters” that go out, and collect Yak Poo, put it in a bag and then sell it to all the teahouses and locals. The Yak Poo is dried into patty’s (if not already dried) and then burned. It needs a little accelerant to get started (usually diesel fuel which makes the whole room smell like diesel for the first hour), but once going, it heats the place up.

A pile of drying Yak poo! The heating source for every home and teahouse!

Here’s a really cool video from some folks that did the Cho La pass just like we did and made a great video of it. Worth a watch, just to see the scale of the pass.

From there, we made it to Lobuche where we had a wonderful meal (all the meals were really good to be honest!) of Dal Bhat and homemade pizza! That night (and the previous night) I didn’t get much sleep and I was not breathing at night and then my body would jerk me awake and I had a feeling of panic and suffocation! NOT fun. So, this night, I slept from 8:30pm to midnight and then just stayed up all night the rest of the night as I was too afraid to go back to sleep! I told Prashant about this and he said I needed to start taking Diamox (high elevation drug) immediately as this was a symptom of Acute Mountain Sickness (AMS). I felt fine during the day and was strong on all our hikes and no other symptoms. I told him I would start after we get back from Base Camp that afternoon. Nausea is a side effect of Diamox and last thing I wanted was nausea on the hike to EBC!

Cakes and coffee with Prashant and BB at Gokyo Resort- 16,000′

The hike to EBC went super well and we again, were super strong passing 100’s and 100’s of hikers. It’s great to be fit, endurance athletes that are properly acclimated! Many are just moving along in slow, slow motion struggling with the elevation, whereas we were moving in a normal fast walking pace. We made it to Gorekshep, which is the last outpost of a village before EBC. We had lunch there and watched the circus that it is. There are constant helicopters landing on a tiny platform, wild Sherpas riding horses, yaks walking around with massive loads pooping everywhere, people in all kinds of thick down jackets, porters carrying massive loads, tents, hotels-ish, and rocks and views and views and views. What a wild place. There is no water here, so all the water must be brought in by porters and yaks. Porters do the majority of the work along the trails. You will see 100’s of them each day. These people are incredibly strong. They carry massive loads all hunched over with a strap around their head to help take the weight off their back. Many times, they are just wearing flip-flops or running shoes and they all sleep in porter teahouses together at night. It’s usually one big room with cushions on the floor, everyone sleeping together under blankets. They don’t carry anything extra, no sleeping bags, extra clothes, food, etc. Truly impressive people.

Gorekshep. Cold, desolate, no water, but cell service and internet as long as the batteries stay charged from the solar panels.

“This way to Everest!” – Kala Patthar in the background- The black pointy hill! The trail up the “hill” in the background is the path to the summit of Kala Patthar, 18,890′. Pumori is the beautiful mountain behind it (23,494′)

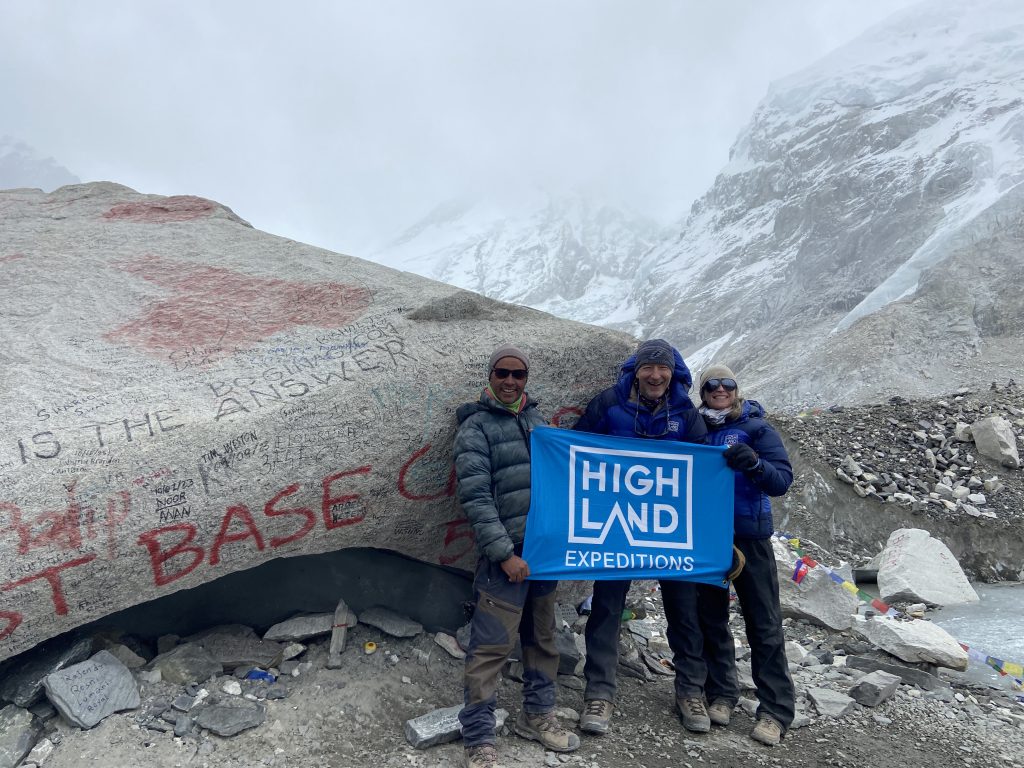
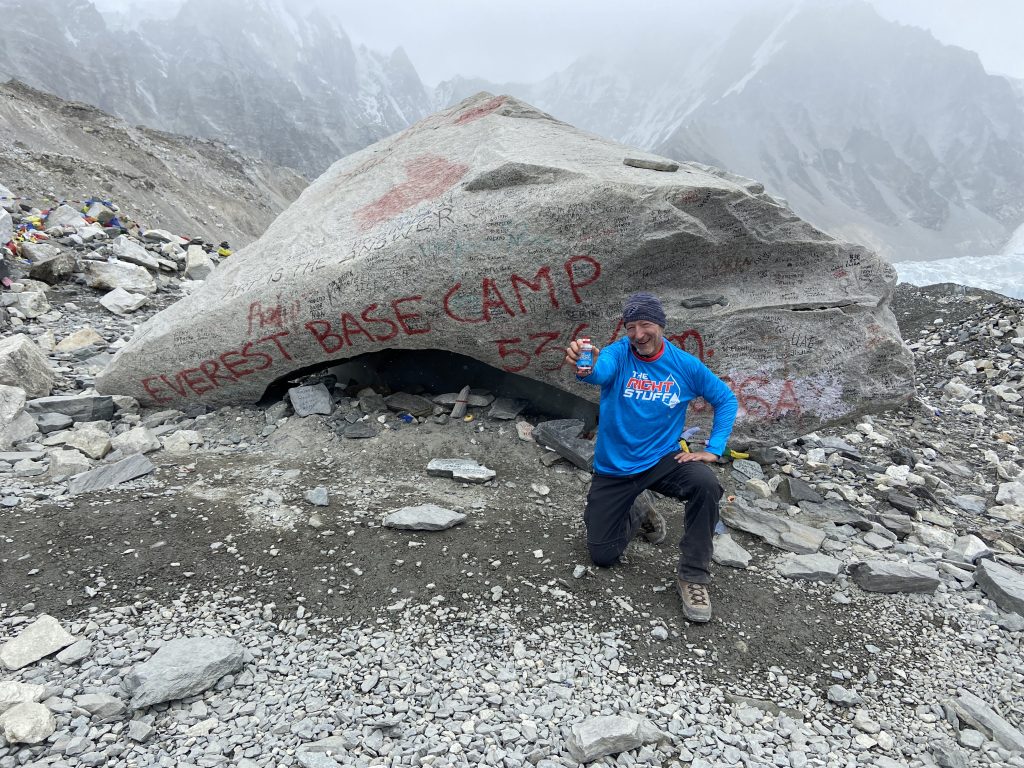
The hike from Gorekshep to EBC was about 1.5 hours long on a trail on the Khumbu glacier. The Glacier is covered by rocks and boulders, so you don’t really see snow and ice like you would on the glaciers in Alaska or Iceland, etc. It’s not easy going to be honest and you have to watch where you are stepping the whole way, not to mention dodging other trekkers, horses, mules, porters and other random things. It was a proper snow and wind when we got there and plenty cold! No view really, but I wasn’t worried because I knew the next morning, the weather was predicted to be amazing and we would get a view then. With the requisite photos taken and our hands frozen, we headed back to Gorekshep where we were staying for the night.

EBC! We made it !

THE RIGHT STUFF!! <<<Click the link for 10% discount. I use this on all my rides and epic adventures!

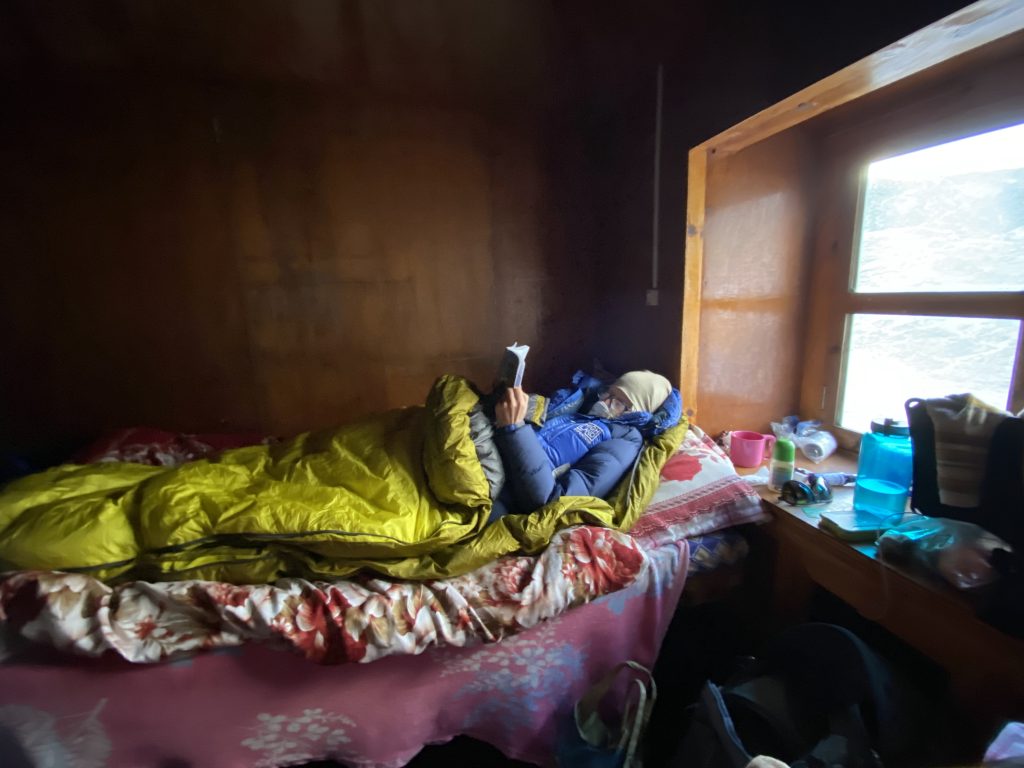
Diane staying warm in her -29C Down bag and down jacket. Gorekshep. The water froze in our bottles that night.

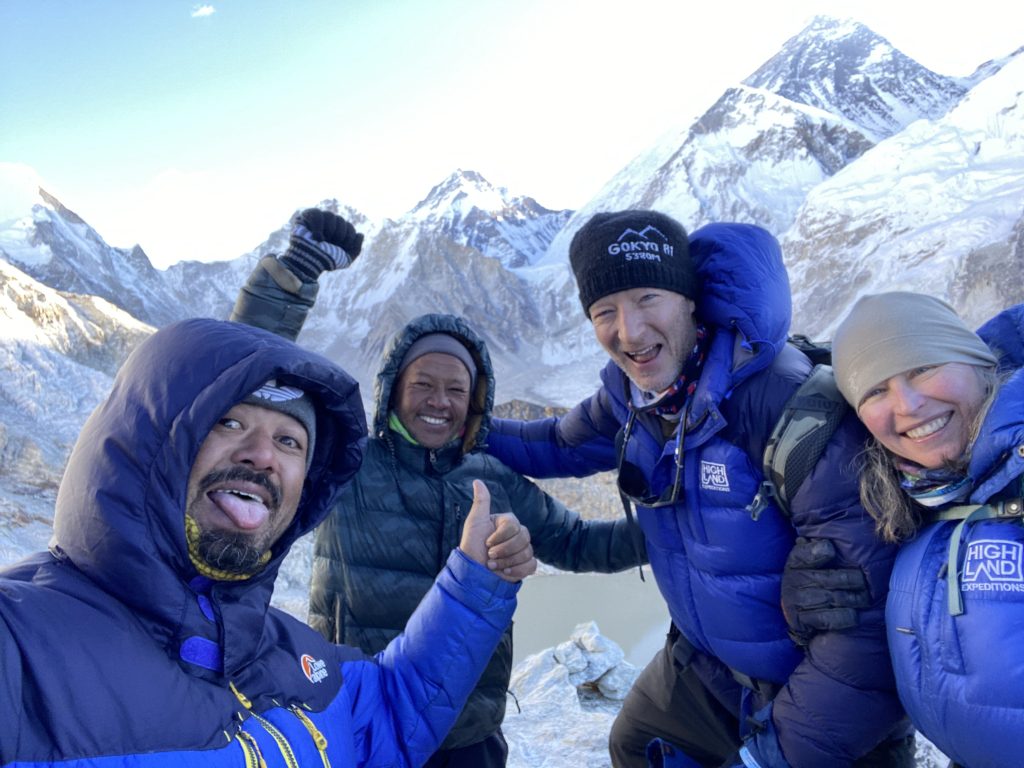
Gorekshep is the highest elevation you spend the night on the trek at 16,800′ and the Diamox did it’s job! I took a nap after lunch and Diane stayed up in the room with me to make sure I was breathing. Later that night, I took another Diamox and slept great until about 2am when Diane poked me awake and told me to wake up and take another one, as I hadn’t taken a breath in two minutes!!! She was scared! Holy crap. I took another one, laid awake for 20minutes for it to take effect and then slept great the rest of the time. In the morning, we got up early at 5am and headed off to summit our last peak of the trek, Kala Patthar, at 18,209′, which is above Everest Base Camp. The sun rises behind Everest and you get these incredible views of Everest, Pumori, Nuptse, the Lhotse Wall and mountains in every direction. This was the REAL destination to be honest, as the views here are just amazing, and you can see EBC below you in the distance. It was completely magical to be there. What a dream come true. It took 1.5 hours up and back for breakfast in Gorekshep. We then headed down for an 8 hour hike all the way back down to 14, 000′ in Dingboche. It was a big day. The biggest of the trip.

That black pyramid is Everest! On top of Kala Patthar!

Summit fever!

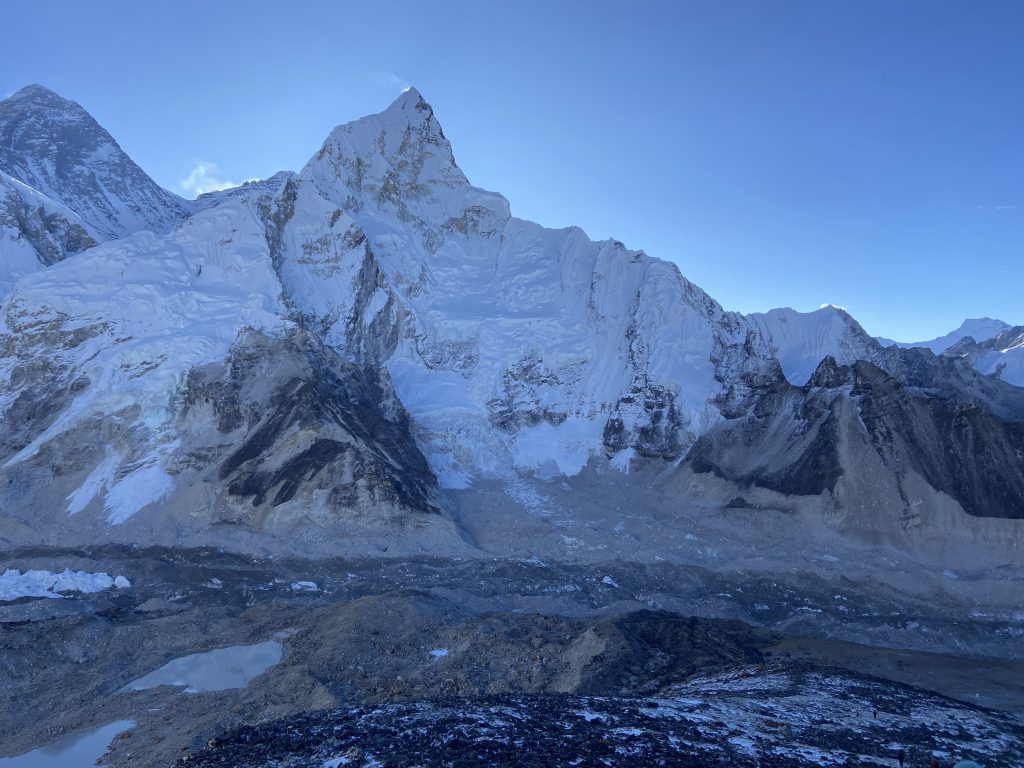
Nuptse in the center and Everest on the left with the Khumbu glacier below. EBC is just on the left side of bottom of the pic near the snow.

We spent three more days hiking back to Lukla and it’s fast because you are super acclimated to the elevation, going lower all the time and then generally downhill-ish. Once back to Lukla, we spent the night and helicoptered out the next morning back to Kathmandu! Check out the video that Prashant shot of the helicopters playing musical chairs. WOW.

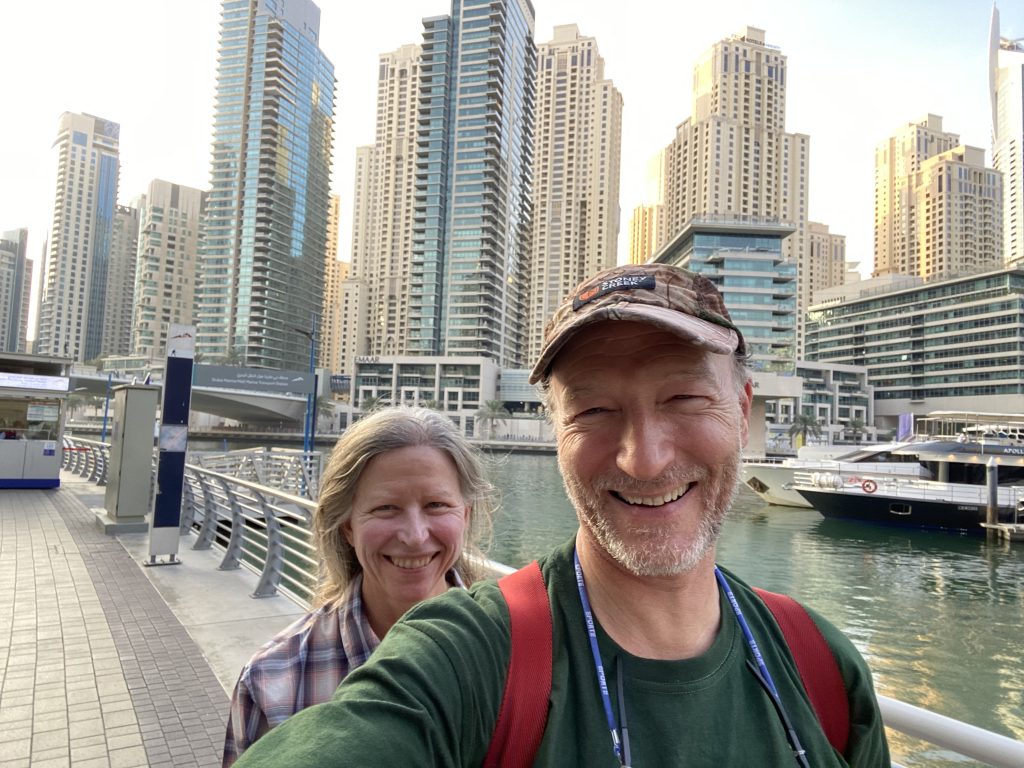
After Kathmandu, we flew to Dubai for some warmth and a “vacation from our vacation” for a few days.

What a contrast! Warm, clean, inexpensive, and friendly, Dubai is a warm place to visit!

This image has an empty alt attribute; its file name is IMG_0192-1024x768.jpg

Totals: 102 miles hiking, 85 hours. Average HR for 16 days –102bpm for Hunter, 100 for Diane.

I can’t say enough about how amazing Prashant and BB were for us. These guys are just incredible guides and 100% professional. Over the top crushing expectations all the time. We saw a lot of guides throughout our trip, and never once did we ever say to ourselves, “Wow, I wish that was our guide.” It was the opposite and we were saying, “I am so glad Prashant is our guide, we are so fortunate. He’s head and shoulders above the rest.” We researched for a long time about which guide company to go with and so happy with our decision to go with Highland Expeditions. The owner, Passang Sherpa, worked with us leading up to the trip to make it custom for us, Passang met us at the hotel in Kathmandu, gave us his personal number, took care of all the details and even ate dinner with us in our farewell dinner after the trip back in Kathmandu. Highland Expeditions is absolutely the best in the business.

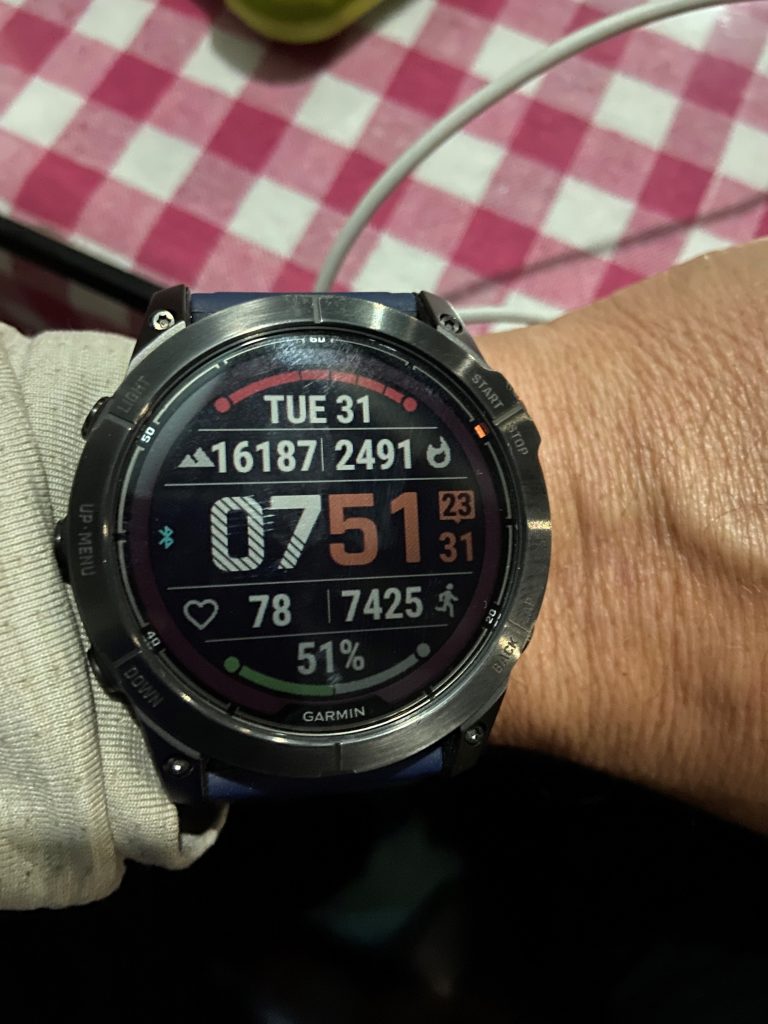
Thanks to our sponsors : The Right Stuff which was huge in making sure we stayed hydrated and no cramps. Rudy Project, which hooked us up with the Star Dash glasses (make an account and you’ll get a discount) with high elevation lenses. Those were CRITICAL. UCAN sports nutrition, which kept our blood glucose stable throughout. Sports and Gadgets which helped us with the AMAZING Garmin Fenix 7x Pro Solar watches. These watches are the best watches we have ever had. They are packed with features. Get one and use PCG7 for coupon code from Sports and Gadgets. Check out that Elevation reading!

Of course Peaks Coaching Group! 😉 Thanks also to Diane, who was the most amazing partner that I could ever have and a joy to be with on all of our adventures.