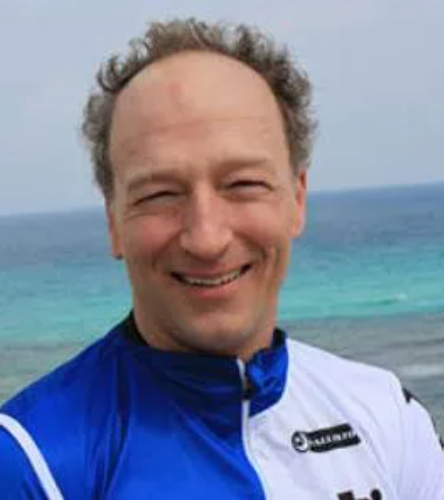
-Most athletes do not rest properly nor enough. Many times, cyclists just don’t give themselves enough rest and when they do rest, they are not really resting. Get a good book, read it. Stretch lightly, eat healthy foods and take naps. If you can take a nap each day, then do it. You’ll be a better cyclist and get fitter faster. When you train hard, recovery is just as important as the training. It’s in the rest period that you actually improve! Yes, when you train, you break down muscles and get tired and sore. When you rest, your body rebuilds, repairs and gets stronger. If you don’t rest, you won’t ever get stronger.
NOT Training Hard Enough
-Many cyclists do not train hard enough when they are supposed to. So many times when I start coaching an athlete, they thought they were training hard. They had no clue! Most cyclists do not train hard enough to really create the proper training stress needed for training adaptation. One hard training ride a week is not going to make you the best you can be. Try three hard days a week, then recover for two days. What about trying four days in a row? Push yourself and push it hard. Then rest. It’s amazing how much you can push yourself and if do not push those limits you’ll never know how far you can go…
NOT staying HYDRATED
-Hydrate, hydrate, hydrate! The #1 reason why cycling races are lost is because of improper hydration. #1. Second place is always not as hydrated as first place. So, hydrate plenty. Hydrate before your event, during your event and after your event!!! If you don’t have to get up in the middle of the night to use the bathroom, then you are not hydrated enough! Bring a two-liter container of water to work each day and finish it off during the day. Have a cup of water beside your bed and when you wake up in the middle of the night, drink some. For every 20-30 miles you ride, you should drink a full water bottle.
Training while you are sick
-When you are 98% healthy, then you can train again. Most cyclists don’t wait long enough after a sickness before training again. When you get sick, have a fever, or cough, then you need to WAIT until you can honestly say that you are 98% healthy again before going out and training. So many athletes will go out and train again while they are 80% healthy and then just drag out the illness for another two weeks. Whereas, had they waited just two more days before riding again, they would have become 98-100% healthy and be back in full training. Here’s the rule: When you think you are healthy enough to ride again, WAIT one more day and then go riding. Give yourself an extra day, or two if you think you’ll be even better on the third day. It’s always better than training for the next two weeks and remain kind of sick.
NOT Stretching?
-Stretching- We cyclist are a funny lot. Nowhere else in your life, do you hunch over and bring your legs up to your chest, never straighten out your legs and then keep your arms stretched out in front of you. Take a yoga class once a week. Stretch out those hamstrings, touch your toes easily, and open up that chest. You don’t want to be a hunched over person when you are in your sixties do you? It’s essential that you stretch each day, even just fifteen to twenty minutes. Your back, shoulders, legs and hips will thank you.
-Mimic your elders- If you are riding with an experienced rider, do exactly what they do. When they drink, you drink. When they rest, you rest. When they attack, you attack. Experienced and successful riders have gotten there because they have learned all the little things that make cycling easier. Some of the best cyclists that I have coached have learned by mimicking exactly what the best have done before them. Kids learn by watching their parents and doing what they do. Why forget that important lesson when we are on the bike?
All changes are big changes
-Give yourself transition time when changing bikes, shoes, cleats, pedals, etc. When you change something on your bike that changes your position in some way, as small as getting new shoes, then take it easy. Transition slowly over a couple of weeks. Ride some easier rides for a while and if you feel any pain, stop. Even on a ride, have someone come and pick you up. I can’t tell you how many cyclist entire season has been ruined because they bought a new seat and then went out and rode 20 hours that week, only to end up getting some kind of overuse injury in the following week. It takes time for your body to adapt to a new movement pattern, and especially for cyclists, as we repeat our patterns over and over hundreds of thousands of times each ride.
Todd Scheske has been a coach for PCG for nine years and has been an integral part of Peaks Coaching Group’s success. His athletes continue to crush records and win championships! Todd coaches road and track racers and really loves racing on the track himself. This year, his athletes have won so many national championships, it’s hard to put our head around it! If you want to win in 2022, then let’s get you in touch with Todd, as he creates winners!
“No matter what we plan initially, life throws us new challenges, weather, illness, injury, and schedule changes. Champions find a way to overcome!”- Coach Todd Scheske
Todd’s2021 Personal Accomplishments
2nd place Eastern Regional Championship 500m Open
6th place Eastern Regional Championship Flying 200m
5th Masters National Championship flying 200m, 6th finishing
Todd’s 2021 Athletes Accomplishments
Masters Men 2k World Recod
Masters Men 1k U.S. Record
1st Place U.S. Elite National Road Champion
1st Place U.S. Elite National Criterium Champion
2nd Place Dominican National Raod Champion
2nd Place 12 hour World Time Trial Championship (50+ AG, 4th overall)
1st Place Master National 2k
1st Place Master National 500TT
6th Place Master National points
6th Place Master National sprint
1st Place Master Men LATOJA Road Race
1st Place Women’s Elite NYS Road Championships
1st Place Men’s Cat 4 NYS Road Champion
1st Place Men’s Cat 3 Criterium Championship
4th Junior Track National Scratch Race 17-18
2 Stage Wins Tour of Panama
Coach Todd’s tips for the going into the off-season and winter!
Going into the off-season
Start planning the big boulders for next year to make sure you address specifics that may need added attention. That includes any equipment changes!
Make sure early in the off season that as a masters age rider you do a hard effort every 10 days. Younger riders… take time away and do some cross training too
Winter Tips
Build strength. Incorporate a resistance training program.
Work on efficiency, review where there are gaps and how to mitigate weaknesses.
BASE. BASE. BASE. AS Dr. Coggan says, “It’s an aerobic sprot dammit”. Get those endurance rides in, but don’t race all the time either!
Cusco Peru, the center of the Incan empire, sits at 11,000’ and over 1 million people live in this amazing location. Normally, for us Americans, we think of a small mountain pass in Colorado being a high elevation at 11,000’. But, for the Peruvians that live in Cusco and at even higher elevation pueblos, it’s normal life. Yet, the locals breathe hard when climbing the stairs, no matter how long they have lived there. One of my clients, Daniel Roura, invited me to race in the Machu Picchu Epic MTB stage race, which is a 5-day stage race around the Cusco and Machu Picchu area, with most stages between 11,000 and 14,000’. I knew it would be incredibly critical to acclimate before the event. How did I do it? Can you do it?
Getting Acclimated
Three weeks before the trip to Machu Picchu, I traveled to Colorado for a week of training and acclimating to a higher elevation. Staying at 9,000’ and then riding up to nearly 12,000 each day for a week was just the thing I wanted to do to begin the acclimatization process and get a possible boost for acclimating to Cusco in just 2 weeks. One of the most important things that you can do when acclimating is to take it easy for the first three days while at a much higher elevation. This means reducing your training intensity to Zone 2 rides and reducing your volume to roughly 50-65% of your normal training load during those first 3 days. It might even be fine to not train at all and allow your body to adjust. During these three days, I rode easy, didn’t push it, and just enjoyed some great relaxed riding up to 11,000’ and took lots of pictures. On day 4, I did a more intense ride and began increasing the total time as well, so that by the end of the 10 days in Colorado, I completed a 9-hour ride over two mountain passes, each up to nearly 12,000’. Of course, I was breathing hard on those climbs, but on that final ride, I passed over 20 “locals” on the classic “Monarch Pass” ride giving me confidence that I had acclimated.
After a hard 10 days of training, it was time for a rest week at sea level and then a hard week of intensity in the week proceeding the trip to Peru. For me, a week of rest is a week of rest. I ride maybe only 3 days during a rest week and really allow my body to recover, heal and adapt to the previous weeks of stress. Most riders don’t rest enough in their rest weeks. Your rule should be to always rest more if you are trying to decide whether to train or rest, during your rest week. This is critical of course for recovery from the previous weeks of training and you need to be able to execute the hard week of training that is coming up! I knew that I only needed one super intense week of training before the trip to Peru, so I wanted maximum freshness to reach the intensity I wanted. The week of intensity consisted of three days exactly the same workout: 3 x 5 minutes at 115% of FTP and 4 x 10 minutes at 100-105% of FTP. This is a great workout to do in your final build week, as you are addressing both the Vo2 and FTP to “eek” out a little more performance.
“Rainbow Mountain”
Once in Cusco Peru, the effect of elevation was immediate as walking up the stairs made me breathe heavily and rapidly. I felt out of shape! Wow! Unfortunately, or fortunately(?), my bike and luggage was stuck in Lima for 3 days, so there was no riding for me! Walking around town, doing a couple of easy hikes up to 11,800’ and generally being a tourist (in the same clothes for 3 days!) was about all I could do. I believe this ended up being a blessing in disguise, as it forced me to rest a bit more, eat some amazing Peruvian food and acclimate without the temptation to go out and ride 3-4 hours a day. Once the bike showed up, I was able to jump on it and get in 3 solid rides before heading to do the “Rainbow Mountain” hike, which was up to 16,000’. I knew these would be a further accelerator to acclimatization and had planned it for the seventh day in Cusco.
Hiking from the parking lot at 14,200 to 16,000’+ at the top of Rainbow mountain was not that hard at all! Pushing the pace the whole way, I ended up with the third fastest time on Strava for the year (so far!). Feeling strong on this day was a real confidence booster as well! If you ever have a chance to visit Cusco or Machu Picchu, be sure to do the Rainbow Mountain hike, it’s worth it!
Tips for High Elevation
At this point, I should mention a couple of additional things that are important to understand and do while at a higher elevation.
Your FTP will be lower! Depending on the elevation you are riding, your FTP could be lower by a whole lot! If you are at 6,000’ then expect about 10% lower FTP than sea level. If you ride at 10,000’ then your FTP will be down by 20% most likely. It gets worse as you go higher and at 14,000’ your FTP might be down by 40%! So, it is IMPORTANT that you learn your FTP at some different elevation levels to help you with pacing.
About eight weeks before you go to a high elevation, you should have your serum ferritin levels checked. Your serum ferritin levels need to be topped off, as once you get to elevation, you will be using more iron than normal. If your serum ferritin tests in the bottom third of the “normal” level, I would suggest an iron supplement. I am a fan of Proferrin. Colorado Biolabs, Inc. Vital health products (proferrin.com)
Beet Doping! Yes, you need concentrated beets! This is a tremendous advantage and makes the difference between struggling and feeling strong at elevation. Beets are high in nitrates and when used in a concentrated form, you increase the nitric oxide in your blood and you can put more oxygen into your working muscles. At sea level, using Beet Elite, increases my FTP 15 watts, and that’s 5% at my FTP of 300 watts! You want to have it working when you start your workouts/event, so supplement at least 1.5hours before the start. You can get Beet Elite on our website. This stuff is magic. BeetElite / HumanN Archives – Shop Peaks Coaching Group
Eating gels and gummies. It is nearly impossible to eat while riding at a high elevation. There is no way I could have choked down an energy bar. You just can’t close your mouth for any length of time when struggling for O2! So, gels and gummy blocks are critical. I wasn’t even able to chew the gummy blocks. I just had to stick them in the cheeks of my mouth and gnaw on them! Sounds crazy, but it’s true. I am a huge fan of the UCAN gels! These things saved my life. Well, not really, but close! UCAN Archives – Shop Peaks Coaching Group
Sleep. Staying at a higher and higher elevation can mess with your sleep. I recommend some kind of sleep aid as well. Whether that’s melatonin, valerian root tea or Ambien, pick up something before you go. You will probably need it. Sleep is critical in your recovery.
Your Heart Rate will be suppressed. Do not be alarmed if your heart rate won’t go up. It will be very suppressed depending on the elevation. My normal threshold heart rate is 165-168 at sea level, but at 11,000’ it was between 147-150. During the rainbow mountain hike between 14,000 and 16,000, it never went over 131 and I was at the limit from 129-131. This is perfectly normal so don’t worry about it.
Machu Picchu Epic MTB Stage Race
After 10 days at 11,000’ and above, the Machu Picchu Epic MTB stage race started, and while climbing is not my forte’ I held my own and finished 27th on the first stage and 3rd for the 50-59 age group, so even though I felt like I was going pretty darn slow up the two major mountains, there were about 60 people going slower! Climbing up the final mountain to the finish (yes, stage 1 was a mountain top finish!), I felt like I was riding so slow and couldn’t believe that rider after rider wasn’t passing me. I continued to pace myself at “sweet-spot” (88-93% of FTP-elevation corrected) and finished relatively strong.
Let’s talk about pacing at elevation. Pacing is critical when at elevation. It is very easy to “blow-up” and go over your threshold with just a little effort. When we ride/train/race at lower elevations, our ability to go above our FTP into zone 5, 6 and even zone 7 is usually very good. We can recover from these intense efforts relatively easy and continue riding near or at our FTP. When you are riding at elevation, you can easily exceed your FTP and not be able to recover from that oxygen debt! When starting a race, a climb, or a hard effort, it is crucial that you build up your power to your FTP and do it in a slow manner, over 5-10 minutes. Starting too hard can be devastating at elevation and force you to have to actually stop riding and recover before you can pedal again! Sneak up on your FTP and then be super careful not to exceed it. Your cadence is also important and while cadence is largely based on your muscle fiber type (fast twitchers tend to pedal slower, and slow twitchers pedal faster), it is still important to watch your cadence at elevation. Riding with a little faster cadence reduces the strain on the muscles but doesn’t increase the strain on the cardiovascular system by the same amount. So, I recommend pedaling with a little less force when at elevation and this will help to keep your pacing under control and manage your respiration rate.
Stage 2 and 3 were both tough stages but didn’t cause too much stress and that’s a good thing as stage 4 was a 25mile climb from 9,500’ to 14,200’! The climb was very gradual and averaged only 3% but that was plenty steep when I got up to 14,200. Since I anticipated it being a 3+ hour climb, I knew I could hold tempo pace (76-90% of FTP) for the entire climb and I also knew that the higher I went, the lower my power would be and the slower I would be! The climb wasn’t all that bad, except for the rain and the cold! By the time, I reached the top of the mountain pass, I was near hypothermic, couldn’t feel my hands, toes or face! The elevation didn’t seem to impact me too much, but the cold sure did! I was excited that I didn’t have any headaches, was able to actually pedal pretty hard from 13,000 to 14,200’ and again finished in 27th place.
The final stage was at a lower elevation from 3,000 to 5,000’ and all of the sudden there were riders around me during the stage that I had not seen before! And they were keeping up with me! I asked them if they were only doing the “3-day” race (stages 1-3-5), but they said no, they had ridden all the stages, but just were not acclimated and finished way behind me. These riders were Peruvian but came to Cusco from Lima (sea level) only a couple of days before the race and every time the road went uphill, they went backwards! I was able to survive the heat and humidity of the jungle stage and finished again in 27th and ended up 3rd overall for the old guys in 50-59 age group.
In conclusion, the answer is yes, you can race at elevation and at very high elevations if you are acclimated! Going to elevation for 10-days about three weeks before can really prime your system and help you acclimate even faster, so I recommend this if you can do it. Otherwise, you should be sure to go early to your event by at least 7 days and more preferably about 10 days. This will ensure that you are well acclimated and ready to race. Follow my tips above as well, using Beet Elite, gels, and a sleep aid if needed. Make sure you have your serum ferritin levels checked at least 6 weeks ahead of time, so if they are low, you have a chance to increase them! In those first 3 days you are at elevation, be very, very careful to take it easy and not ride hard. Just relax for three days, rest a bit and then you’ll be even better for it after. Pacing yourself is very important and becomes quite obvious on that first day you ride near your FTP!
I first met Hunter on a Zwift ride organized by UCAN. That specific workout had us doing some high cadence work, and I asked him about cadence.
I, like many other triathletes, tend to have a fairly low cadence and Hunter gave his advice.
Who better to get advice from that the father of training with power, a co-founder of TrainingPeaks, and a guy that has Zwift workouts named after him?
For those who may not know you, how would you introduce yourself?
I’m an endurance athlete coach specialized in training with power meters since 2002/2003, and I was a founder of TrainingPeaks software.
I helped develop the desktop software, WKO, and I’m also the first author of the gold standard book on training with a power meter.
I wrote this with Dr Coggan.
I know of his work as a HRM guy, is that right?
At one time he had the most peer reviewed studies in exercise physiology so he’s just been a prolific writer in this area.
He was also an avid competitive cyclist and he had been training with power in the lab so he got a jump start on how to train with heart rate monitors and power meters before they were widely available to the public.
You originally got started cycling through BMX, is that right?Tell us a bit about your background and how you got started in cycling.
I raced BMX from 11 to 18. It was awesome. It still is awesome.
BMX is one of our only feeder systems in cycling. Triathlon doesn’t have that.
Other sports, do, though. You play soccer when you are 4, football and baseball when you are 8, or whenever.
But what’s kids’ entry into cycling? BMX.
BMX is fun and every kids wants to ride through the mud.
Right, I guess BMX is a lot more fun for kids than time trials, right?And you worked with the 2008 BMX team at the Olympics in Beijing, too, didn’t you?
Yes, I did. Previously we never had power meters on BMXers. We didn’t understand what the power demands in BMX were.
So, I went to USA cycling and told them I’d love to get power meters for the BMX team and see what we can learn and see if we can help earn some gold medals.
We started doing this in 2006, and in 2007 we started testing the athletes. We even built an exact replica of the Beijing track in Chula Vista California. It was modelled after the one they’d be competing on in Beijing.
So we got to test all these athletes on the track and train them exactly the way we were going to have them compete.
With BMX power I imagine you aren’t looking at VI (Variability Index) and smoothness like in triathlon.
No, the jumps are so big and so long, they would get what we call micro rests in the air.
So they’d have a short rest in the air, land, and then hit the next jump.
But the riders that could do maximal explosive force followed by a rest of 2-3 seconds and then do it again were really the best ones.
There was a cadence cut-off of those who made the Olympic team and those who didn’t.
They’d do 180 RPM and 1500-1800 watts. The others that didn’t make it could only do about 160 RPM.
Would you say that everyone in BMX uses power now?
No, not at all. But the other Olympic teams do, now.
What are the brief milestones of your cycling and sporting career? Can you talk us though this chronology?
Turning pro was one of them – that was always a dream of mine, and it finally happened in the mid-90s. I and won some pretty nice size races here in the US. That’s when I slayed my dragons so to speak.
Then after that, becoming a coach. In the mid 90s, there were no coaches to take you under their wing. I realized I had some specialised knowledge and wanted to share that with as many people as I could.
What was next after that? Developing TrainingPeaks?
Yep, my client Kevin Williams and I went to the first ever power seminar, in Philadelphia, and Dr. Andy Coggan, Allen Lim from Scratch Labs, and Dean Golich were there.
And so those guys talked about training with power and each one of them said we don’t have a away to analyse this data.
That’s when Kevin said, “Hey, I can build this software.”
There was some software at the time, but it just showed you a squiggly line of a single ride and you couldn’t really analyse your cumulative training.
But then we developed it to show aggregated activity and in 2004 we launched it. That was called Cycling Peaks.
Then, we merged that with Dirk Friel and Gear Fisher’s company – TrainingBible.com. And Training Bible plus Cycling Peaks resulted in TrainingPeaks.
So is there a lot of confusion between Peaks Coaching Group and TrainingPeaks?
All the time. We get calls weekly with people asking questions about their software account.
So you could start a side business as customer support for TP it sounds like.
But you know that I think is super cool? Where the “peaks” part of the names came from: The mountain Thomas Jefferson measured in 1815 near where you live called The Peaks of Otter.
That’s awesome!
These peaks overlook the town I live in an there’s tremendous history here. All the locals that grew up here call it “The Peaks” and so I wanted to have a name that kind of honored that and the same time honored what we were striving for – a peak performance.
We can’t all win all the time, but we do want to strive for that peak performance. The best I can do on that day is what I’m striving for.
Are you involved with TrainingPeaks anymore?
No, I sold all my equity at the end of 2014.
What do you think about PKRS and the other various AI type of training systems that are emerging?
Do you think there’s a place for an automated coach that’s intelligent enough to adapt a plan to your input, either by data or let’s say by text messages, tags, or qualitative / subjective feedback?
For example, you tell it, “that hurt” or “felt my IT band flaring up again” and it adapts?
I think it definitely is coming, for sure. When you think about AI the first stages are just a bunch of algorithms and decision points and rules, but that’s coming. It’ll be interesting to see.
I think there’s a group who will like that because they don’t necessarily want to have that relationship with the coach. They don’t need it or want it but others still will.
But it will take time. We live in a capitalist society so it has to be monetary reason to do it.
What’s the biggest mistake you see most TT or tri cyclists making?
Kind of like you – they pedal too slow. I think in triathlon we see a lot of riders pedaling at 80 RPM or less and they think that by pushing this bigger gear they’re saving energy but in reality that’s not the case.
They’re pushing too big of a gear, putting too much force on the pedals and anytime you are putting more force on the pedals you are using more muscle glycogen.
He has a whole series of Zwift workouts
So you are using too much muscular force, when you could shift that stress to your cardiovascular system.
Your job on the bike is to preserve your muscles on the bike so you can run fast. If we can pedal at 90 RPM or very close we’re saving a lot of energy and setting ourselves up much better for the run.
But I FEEL more comfortable at 80 RPM.
But that’s a practice thing, Andrew. You need to do those cadence drills and begin getting the body used to it. You need to start to gradually do that.
Do 10 sets of 1 min fast pedals every day for two weeks and then do 20 min of fast pedaling without stopping. Don’t worry about your power, just your cadence. And that becomes habit.
Is it all about having the right IF (Intensity Factor, or percentage of FTP) and then a smooth VI?
VI is super important, absolutely. You have to be very smooth and steady to preserve that muscle glycogen on the run. And that’s where some of that slow RPM stuff has come from.
Because it is easier to be smooth, but being smooth with a higher force is counter-productive for a strong run.
So both you and Joe Friel have top-rated books on power meters. But yours was first, right?
Yes, and it was received really well. There was a pent-up demand in 2006 because when had this information around now and by then a lot more people bought power meters and were trying to figure it out.
So finally people could read how to use it with the system that Andy and I developed.
What’s your chosen power meter?
I’ve got them all, or most of them. All of them have their own pros or cons, but the PowerTap hub which has been around since 1998 or 1999 just works. I’ve got it on a really nice sent of ENVE wheels and it works every time.
I’ve got the Infocrank, Rotor, SRM, PowerTap pedals, Favero pedals, Stages and probably a few more I have forgotten…
Tell me about your nutrition when you race. What do you use?
I’m definitely a UCAN guy for sure, I really like UCAN. I came to them because I do a lot better with lower blood sugar spikes. I’ve always been very sensitive to that and as a pro I had to keep energy levels up and would bonk easily.
I became carbo addicted. So I was trying to change my body back to more of a fat burn and I worked on that for many years but nothing ever in the sports drink industry could do that – it was all just sugar and that still puts you on that roller coaster.
Sometimes you’ve got to have it, but I just don’t have that roller coaster effect with UCAN and don’t need as many calories and I just feel better.
It’s pretty revolutionary. I’ve been this industry along time and have seen so many sports drinks come and go but UCAN has done something revolutionary.
What is your nutritional philosophy or approach for everyday eating?
I tend to be protein heavy and eat as many fruits and vegetables as I possibly can. I do like my fish, chicken, and red meat. All my meals have to have a good source of protein where I’m not on this roller coaster of carbs.
OK so more protein but you’re not like a high-fat, low-carb type.
I think that would work for other body types but that would just make me fat. Haha.
Which athletes, triathlete or other do you admire the most? Or that you have enjoyed following over the years?
He’s not a pro anymore but I really like TJ Tollakson. He won the 2014 Lake Placid Ironman and maybe 2009. He’s the owner and founder of Dimond bikes. He’s one of these guys who has worked really, really hard, used a lot of power training principles and science, and has brought those things together to be an Ironman.
Do you have any tips, tricks, or hacks to a faster race?
There are a couple things I would suggest.
First of all, you have to be comfortable on your bike. That’s the first thing that I do with all my triathletes. You have to get a fit that you are comfortable in.
You need to feel at home and be able to relax on the bike. You have to feel like you’re on your favorite couch at home.
Well, maybe not that comfortable, but if you’re not very comfortable you can’t stay aero as long as you need to be.
I also think you need to spend 12 weeks in the off-season working on strength and flexibility. Get in the gym, do the functional strength, take a yoga class and harmonize and balance the muscles.
Is it too early to begin next year’s foundation training? Yes! You need a break at the end of the season. If you are planning on a big 2022, and you are just finishing your 2021 season, it’s not too early to plan though! You do need to take a break to re-charge your batteries, and that usually lasts a 2-4 weeks, but that is also what I consider as prep for 2022. Now is the time to really plan for 2022 and once your enter into the off-season training phase, I want you to consider some of the below workouts and training principles to make 2022 great!
I really don’t like the phrase, “Base Training” because it produces images of long, slow distance training where your watts are at 60% of your threshold and you just putter along in your ride. Too many athletes and coaches believe that an athlete has to do “Base training” first and before any other type of training can be started. Now, I’ll concede that if you are a Pro cyclist and training for a huge season in Europe in 2022, then yes, you should be doing some serious “Base training” right now. Riding your bike for 4-6 hours a day at endurance pace will help continue to develop your aerobic system and also prevent you from peaking in January. But, everyone else? Forget it. We don’t have the time to put in 4-6 hours a day at a slow pace, stopping at coffee shops along the way and enjoying the sights.
For most of us, we have only 1-2 hours a day to train and we have to make the most of those hours, optimizing our training for the highest ROI. If we took that 1-2 hours a day and rode at endurance pace, then what would happen? We would lose fitness and get slower. There is a relationship between time and intensity that must be respected and the lower the intensity the longer the time you should ride in order to stress that energy system. If you really want to improve your endurance system, then riding at endurance pace for 4-5 hours is what you need to do. A 2 hour ride will not be long enough to create the necessary stress on the body in order to adapt and improve endurance. So what is the correct intensity for your 1-2 hours of available time? This is the tempo zone, Level 3 on the Coggan Power Level chart and from 76-90% of your functional threshold power (FTP).
Riding at tempo pace is a challenge and not easy, but it won’t make you peak in January either. By pushing yourself a little harder this winter in your shorter sessions (many of us are stuck on the trainer all winter too!) you’ll be able to stress your aerobic system appropriately enough to continue improving throughout the winter. In a previous article, that was titled, “The Next Level”, I talked about how to train in order to get to that elusive next level of fitness and riding at the tempo level this winter is one of the keys toward moving to that next level. You have to be willing to trust and believe that training in the tempo zone will create the training stress you need as your “Power Foundation”. This phrase, “Power Foundation” is how I prefer to talk about winter and pre-season training as it doesn’t conjure up those dreaded thoughts of LSD training, and more focuses one on the ‘power’ side of the equation, since your goal is to increase your power at threshold this winter. Overall aerobic fitness improvement is always something that we all want to accomplish every season as more fitness=more fitness and you will be riding faster than previously.
What types of workouts should you do this winter to make sure your “Power Foundation” is sufficiently challenged? I have written below three workouts that are perfect for both indoor and outdoor workouts, as each can be adapted to either environment.
Tempo with Bursts and Big Gear efforts- This workout is designed to make you ride at a relatively high intensity keeping your aerobic system taxed, but not so much that you can’t do the big gear efforts afterward. The big gear intervals are done afterward since your muscles will already be fatigued from the tempo work and then make you summon more strength to do the work. The big gear efforts are there to help you create some additional muscular strength and translate any weight training you might be doing onto bike specific work.
Warm-up (WU): 15 minutes. Main Set (MS): Then Nail it for 60 minutes at 80-83% of your FTP, with 20 bursts (every 3 minutes!), hold for 10 seconds at 120% of your FTP. EASY 10 minutes. Then do 20 minutes at 80-83% of FTP and this time do big gear intervals- Put it in your 53:13 – 50 rpm and every 2 minutes, (so 10 total)… Slow down, stick it in the 53:13, stay seated and then use strength to push it to 90rpm. Once you reach 90 rpm, and then back to your tempo pace. Cool-down (CD): 10 minutes easy spinning
Tempo and Sweet Spot intervals- This workout is designed to both fatigue your muscular endurance and cardiovascular system. By doing two longer 30 minute intervals at your sweet spot(88-93% of FTP or Upper tempo/lower level threshold pace), you’ll really have to work and stay focused but it will be ‘do-able’. After you do the 30 minute efforts, then you’ll have to ride at tempo for 45minutes, but at lower level tempo pace, which again will be challenging but stress that muscular endurance system.
WU: 15 minutes steady.MS: 5×1 minute fast pedals- over 110rpm with 1 minute recovery between each. Then do 2×30 minutes at 88-93% of threshold, right in your sweet spot. Rest for 5 minutes easy between each. Then finish with 45 minutes at 76-80% of FTP. Nice tempo, but not hard. CD: 15 minutes.
Solid tempo workout- This is your bread and butter winter workout where you get plenty of tempo work done and that will challenge your cardiovascular system and is sure to make you “red in the face” with some early, hard work to assure you are awake.
WU: 15 minutes steady and smooth, getting the legs going.MS: After you are warmed up, do (1) 3 minute effort all out to get the carbon out of the legs, shoot for 115-120% of your FTP. Then do 5×1 minute fast pedaling intervals with 1 minute rest between each. Ride for 20 minutes at endurance pace and faster cadence than your normal self-selected cadence by 5rpm. Legs just spinning a little faster than they want to! Then do 60 minutes at Tempo pace, NOT race pace, but a notch below uncomfortable, but do-able and at your normal cadence. Tempo Pace is 76-90% of FTP. CD: 10 minutes.
These workouts are just some of the great variations on Tempo that you can do this winter. The goal is to keep improving, without peaking in January and build your ‘foundation’, so that you’ll be ready for more intense threshold work later. These workouts are for riders that don’t have 4-6 hours to ride each day and will keep your fitness higher throughout the winter than normal, but that means you don’t have that far to go in order to peak for your key event in the spring. Give these workouts a shot and you’ll be pleasantly surprised with your new higher threshold this spring!
Using your power meter in cyclocross is not only effective, but arguably one of your best weapons in pushing yourself to the next level. Cyclocross brings its own set of demands in that you must be able to create quick bursts of effort over small obstacles, leap off the bicycle and run while carrying it for sections as long as 30 seconds – all the while maintaining a your race pace. Cyclocross might not seem like the best place to utilize a power meter, since there is hardly time to get a sip of water from your bottle, much less look at those tiny numbers on the handlebar, but there are quite a few ways you can use a powermeter to improve in cross. What if you knew the best tire pressure to run for optimal power output , traction and puncture resistance? What if you knew the correct gearing to use in that upcoming race when you have to cross the tilled farmers field? How important is your warm-up and how much does that impact your race? The answers and more can be found with simple power analysis of your training and racing files and that’s the true “power” of a power meter for cross. You are going to use it more as a post-ride/race tool and not so much focus your hard-core cross race rehearsal or race itself and from that perspective you can use that information to tailor your training so you’ll be ready for the next race.
While the data from a cross race is invaluable, I won’t try and fool you, there are barriers to utilizing a power meter and it’s data as well. First off, you need to understand what all those squiggly lines mean in the download and how they relate to the terrain, your effort and even your line on the course. Coaches like myself have been using power meter data now for over 10 years to help their athlete improve in a variety of cycling disciplines and while consulting a coach can definitely shorten your learning curve, it’s not required. For those of you that are more artsy, fartsy(as my mom used to say), and less analytically inclined, all this data might be a bit much and conversely… for all you engineers out there, you might become too obsessed with the numbers! On the whole, once past the learning curve, I know you’ll really enjoy training with a power meter and the new dimension it brings to your passion in cycling.
Power meter files from ’cross races typically average about 20 to 40 watts below an athlete’s actual FTP, since there’s so much “down time” when the athlete is either coasting down a technical hill, off the bike and running or just experiencing a lack of traction. The difficulty of putting the power to the ground skews the power numbers down, and one has to take this into consideration when reviewing cyclocross power files. Because of these running and technical coasting sections, it’s hard to determine the exact muscular demands of cyclocross. When viewed in a Quadrant Analysis plot, which breaks down a ride based on time spent with different force outputs and cadences, a ’cross race contains the largest amount of amount of the effort in Quadrant II, which represents slow pedaling and higher force, but Quadrant III (slow pedaling, low force) and Quadrant IV (fast pedaling and low force) are also heavily represented.
When you examine your power file from a ’cross race, one of the first things you might notice is that it looks a lot like some of those criteriums many of you did earlier in the year: loads of stochastic power spikes, easily discernible laps and big “race winning” type efforts are all commonalities to criteriums. A cyclocross power file will define the power bursts needed in the race, reveal the amount of rest in each lap and show the overall training stress accumulated in the race. One thing that’s important to identify in a cyclocross power file is the number of efforts you have above your FTP and how long each of these efforts is. In other words, how many matches you needed to burn. A cyclocross “match” is a little different than a match in a road race or a criterium because most likely you will already be at your FTP and then have to do hard efforts above it, depending on the terrain and your competition. In this case, the matches are really just bursts of flames coming up from the already raging fire! However, identifying these flames and their intensity will allow you to train more specifically for the effort.
After reviewing hundreds of cyclocross race and training power files, I have determined that a specific training workout good for ’cross is one that I call the “30-30-30” workout; it’s made up of 30 seconds at 150% of FTP, 30 seconds coasting (0% of FTP) and 30 seconds of running. The “30-30-30” workout is done continuously for 10 minutes and then a rest is taken for five minutes before doing two to four more sets total.
The “30-30-30” Cyclocross workout
15 minute warm-up, level 2.
(1) – 5 minute hard effort at 110% of FTP
5 minutes easy- Level 2.
2 x 10 minutes — 30- 30 -30. Which is 30 seconds RIDING hard as you can, 30 seconds not pedaling and coasting, 30 seconds dismount and running fast…. REPEAT.
10 minutes Level 2 after each 30-30-30 block of efforts.
4 x 2 minutes- at 150% of FTP. Anaerobic Capacity work.
REST 2 minutes after each.
10 minutes Level 2
Finish with 10 x 1minute FAST PEDALING at 110rpm+. 1 minute on, 1 minute off at 80rpm
15 minutes cool-down
One of the most important reasons to use a power meter is to training for the demands of the event, and this reason is highly applicable in the case of cyclocross. Addressing the specific needs for a strong anaerobic capacity along with highly-tuned technical skills (dismount the bike, run with the bike and remount) creates a perfect blend of a workout in the “30-30-30,” which you’ll find below. Along with this anaerobic capacity workout, cyclocross demands a strong FTP, so the traditional Level 4 threshold workouts done at 4 x 10, 3 x15, and 2 x 20 minutes at FTP are important for the successful ’cross racer. As Sam Krieg, a coach for the Peaks Coaching Group and Elite ’cross racer said, “The ability to train with power on your ’cross bike and develop specific ’cross workouts has allowed me to not only coach ’cross riders more specifically, but also improve my own fitness. My favorite workout is the ’30-30-30′ that Hunter developed because of the structure it provides – the nearly identical similarities to my ’cross races – and it forces me to go hard for the entire 10-minute set.”
Kris Walker, the 2009 national champion in the Masters (45-49) Time Trial and 2008 Masters Cyclocross events adds, “As a classic steady state rider, my forte is my ability to hold a constant power for the entire event, and cyclocross is very challenging to me because I have to train my weakness , anaerobic capacity. After reviewing my power files with Hunter, we were able to determine just exactly how much anaerobic work I was going to need in order to be on the top step of the Cyclocross National Championship podium.”
Cyclocross is another discipline within cycling where using a power meter in order to train more quantitatively and also more specifically to the demands of the sport allows racers to improve their performances. A key component of this improvement hinges on the ability of the athlete to mimic the demands of upcoming ’cross races and develop training routines for them. As the popularity of cyclocross continues to gain momentum, more and more racers will be using a power meter to collect data, analyze the demands of the events and then train for them.
This is an article that Hunter wrote for Cyclist Magazine based in the United Kingdom. The author of the column Michael Donlevy also asked Hunter what he likes to call “quickes”, which are just some quick random questions.
Is there a best time of day to train? I’m a morning person, but I have many clients who ride better in the afternoon. Best time of the day to train: when it’s best for you.
What’s the first thing I should do after getting off the bike following a training session? Stretch! Stretch those quads, hamstrings, calves and shoulders, and open up the chest with some back bends or ‘up-dogs’.
Does a lot of sweat signal I’m unfit? Not at all. It just means you have an efficient cooling system. Congrats!
Longer or harder? This is the million-dollar question and the answer, of course, is both. First off, you have to define the demands of your event. Is it five hours plus? Is it a short one-hour race? This is where you start to determine which is more important. Riding harder with more intensity close to or at and above your FTP will make you faster, period. FTP – functional threshold power, the maximum average power you can maintain for around one hour – is the most important physiological determinant of performance, so if you improve your FTP by 30 watts doing intervals, you’ll be faster.
When I coached the winning solo woman for the Race Across America, Janice Sheufelt, she did FTP intervals. I wanted her FTP as high as possible so she would be fitter, but she also did some huge 40-hour rides to make sure she had the endurance. So my answer is always to do your intensity first, increase your FTP, then work on the longer rides as you get closer to your event.
Endurance rides help to increase your aerobic ability, which helps to bolster your FTP and also increases your stamina, which is the ability to maintain as close to your FTP power for as long as possible. ‘Endurance’ is the ability to complete a long ride. Most of us can do that. ‘Stamina’ is the ability to hold close to your FTP for a long time, like six hours. Many events require more stamina than endurance.
Everyone has a ‘bathtub’, or level of fitness. Some bathtubs are small with tall walls and a small drain, like a track sprinter’s. Others are wide with short walls and a big drain, like a randonneurs. What most of us want is a large bathtub with tall walls and a big drain. The height of the walls represent your FTP, the size of your drain represents your aerobic efficiency and the taps are the watts of resistance. The water represents the lactate and other byproducts of hard work, and the total volume of the bathtub is your overall fitness. To increase the height of your walls (FTP), you fill the bathtub up to the edge and hold the water there, just before it spills. To increase your aerobic efficiency, you fill the tub three-quarters of the way up and keep it there – water in equals water draining out – by ‘firehosing’ the bathtub for 30 seconds and then turning off the firehose just before the water spills over. This increases the size of your drain and the height of the walls. This is basically what intervals do.
In terms of a plan, do at least two days of work on your FTP each week and one long ride per week. Twice a month, your long ride should be at least 15% longer than your longest ride from the previous month until you reach 20% more than your target race/event time.
You can focus on one or the other, but ‘training stagnation’ is the enemy of improvement, and this is where intervals are so important. If you work on increasing your endurance for six months but all of your long rides are five hours, you’ll be adapted to that five hours and you’ll no longer see improvements. If you do 6×10 minutes at FTP four times a week, your FTP will increase to a certain ceiling and no higher. By combining a long ride with hard intervals you’ll break out of that stagnation and challenge the body to adapt to the new higher level of training stress. Continual improvement means continually increasing your total volume and intensity. And rest helps too.
Training only one energy system will give you one-dimensional ability. Almost all cycling requires being good in all the physiological energy systems, so you need a good blend.
Hunter Allen is a USA Cycling Level 1 coach and former Professional Cyclist. He is the co-author of “Training and Racing with a Power Meter, co-developer of TrainingPeaks Software, and is the CEO and Founder of the Peaks Coaching Group. This has been the 25th year that he has conducted training camps in the beautiful Blue Ridge Mountains.
With the advent of power meters, one of the age old questions asked by many can finally be answered. How much training should I do before I rest? When should I take my rest week? As coaches and athletes, we have never really been able to determine the best time for an athlete’s rest week other than going by the standard 3:1 work/rest ratio(which is very good btw) or listening to your body (also a good thing). However, these can be somewhat arbitrary and subjective. Some riders can go longer than 3 weeks before needing a break, and others need a rest after only a week of focused training, while others might be able to go for 6 weeks before needing a true rest week. Discovering your ideal work/rest formula is just as exciting as discovering your threshold improvement formula. This is one of the many changes that have occurred in training for cycling since the introduction of power meters and cutting edge software. Now, that we can quantify training load and the corresponding response to that training load, finding your ideal work/rest formula is only a matter of time and data analysis.
What is your work/rest formula?
Let’s examine an athlete that I have coached for five years in order to better illustrate the principles behind this concept. The rider is Gilbert Ducournau, a young rider, 22 years old and a Category 1 that was striving to turn professional at the end of 2015. He has been racing seriously since he was 17 years old, and each year has progressed up the ladder in both categories and FTP. As he has progressed and matured as an athlete, his ability to recover has also improved and over the years we have had to update his work/rest formula. In year 1(figure 1) of his training, he was barely able to train hard for two weeks before he needed a rest week. Gilbert was new to endurance sports and really struggled with the initial training and frequently needed breaks in order to recover in the first four months of training. After the fourth month, he was able to handle nearly 6 weeks without a rest week. However at the end of the 6th week, he did get sick and had to rest for two weeks. Therefore in retrospect, he still wasn’t ready for that long of a block of training.
Know your goals
As we jump forward to year 4 of his training, where Gilbert achieved a Category 2 ranking, and he was able to sustain a very hard two weeks of training, followed by 3-4 days of rest and then train hard again in the early season. As Spring approaches, he was able to consistently increase his training load for 8 weeks with short micro rests, so that his TSB(Training Stress Balance) never dipped too low, hovering around -24 and -12. In the middle of this phase, he went to a training camp which significantly upped his training load and now his TSB dropped to -50 and this created the needed rest week. During the summer, he was able to consistently train hard for two weeks with one week of rest. This was an interesting year and one that will be important for you to understand and look for the pattern in your own workouts.
The pattern here was:
1) He was able to train very hard for two weeks, but then needed a rest week.
-or-
2) He could train relatively hard, and then only take 2 to 3 days easy and continue on this schedule for 8 weeks.
This brings about the questions, which was better for him? Which is better for you? Will a 2 week very intense block of training be better than 8 weeks of steady hard work? The answer to this question depends on the goals of the athlete. If you are in the beginning of the season and need to improve your FTP quickly with some hard focused weeks of training then that will be a good choice. Another scenario to use the 2:1 formula, is if you are in the middle of racing season and/or need to get a quick bump of fitness, then do the 2 week intense block. If you are building to a peak of fitness and your “A” goal, then stick with the longer, and steadier progression. The take home here with Gilbert is that I was now seeing a nice pattern of improvement based on two different work/rest formulas. This could now be used in future seasons.
In Year 5, we finally saw his true sustainable training ability come to fruition. His season was up and down, as he had a great spring, but unfortunately crashed and fractured his hand in 3 places which required surgery, and then a month later, a second surgery. These two events dramatically slowed down the middle of his season, however, if we looked at his season as two separate parts, we saw a very different rider in this 5th year of hard training. The first half of the season, he was incrementally building his CTL up to the middle of February and then pushed very hard for 4 weeks driving his CTL to a career high of 96. This was a new pattern, but made sense in that his previous year he was able to train hard for 2 weeks and not quite as hard for 8 weeks, so was now splitting the difference with a hard 4 weeks of training. At the end of that 4th week, he didn’t need a big rest period(more than a week) like previous years, but a solid 7 days of easy riding brought his TSB positive and then he now maintained between 90-98 CTL for the entire month of April and kept his TSB just barely positive for good results on the weekends. While, I had predicted that he could hold a solid 4 weeks of training, it wasn’t obvious that he could do this from his data, so I had to rely on his previous year 4 data to see that the expected outcome would be 4 weeks splitting between 2 and 8 weeks.
The “holy grail” of training
The middle of the year was a bust with recovery from his broken hand. But, the fall and winter have been very good for Gilbert as he has been training for the Vuelta a Tachira in middle of January . Looking at Figure 4 below, he has been able to maintain an incredibly steady and incremental ramp rate of 5-8 TSS/week as an increase in CTL that peaks at 137CTL at the end of 2014. This has been his longest, continuous block of training and his highest CTL ever. This long ramp of training load increase has been sustainable because of two things: 1) Ability to handle this type of training. 2) Short rests within the build period that allow for some recovery. These short rests are critical to keep fatigue at a level which still allows for hard training and focused efforts.
Hard training does not always require absolute freshness and the mark of a successful cyclist is one that can train hard while tired and still gain a tremendous training response from it. If you have made it this far in the article, note that you have now gotten to the magic of using a power meter. Pay attention closely! By using a power meter, and watching your Performance Manager Chart to modulate the exact amount of fatigue(negative Training Stress Balance) and freshness (positive Training Stress Balance), you can continue training while fatigued for a very long period of time. Let’s examine Gilbert’s PMC with a higher level of detail (Figure 4), so you can easily understand this concept and how to use it in your own training. The most important detail in this Figure 4 is that the blue CTL line continues its steady march upward with short bumps of hard training followed by short rests. This allows Gilbert to continue to train hard and rest just enough in order to train hard again. He continues to increase his CTL to the peak of 137, without a single day of positive TSB in the entire 12 weeks of training! Practically speaking, what does this mean from day to day, week to week training? I planned his training so that he would do 3-4 days of hard training, followed by 2-3 days of easy riding.
This can also be viewed as “block” training, where the athlete trains in a “block” of days, and then rests until he is ready to resume training. In this case, I did not allow him to have full recovery and forced him to return to training with some fatigue in his legs. The combination of work/rest changed radically from the two weeks on and one week off, or just steady hard training. Now, he has been able to achieve the holy grail of training, the ability to train very hard to near exhaustion in 3-4 days and then recover quickly in 2-3 days, ready for another block. These micro-rests are critical in the equation as it’s that small recovery that allow the TSB to move toward a positive number (not become a positive number though!). It is critical in your own training that you watch your Performance Manager Chart closely so that you don’t become too fresh. I would recommend allowing your TSB to get to -10, but not any closer to 0, in order to maintain the constant ramp rate.
Work/Rest Strategies
Training has always contained a bit of “Art” along with the science of exercise physiology, however there are 3 strategies that you can use in your own training. First, try the strategy of two weeks hard and one week easy (also try the 3:1 ratio as well), especially if you are relatively new to the sport. Secondly, try to extend the length of your harder weeks, so that you can do up to 4 weeks without a full rest week. This period will contain the micro-rests, and the first time you embark on this journey, I recommend you reduce your overall intensity just a little and by that I mean reducing the number of intense days, not reducing the percentages in your training zones. This will be the toughest transition for you, but if you can do it and keep your CTL ramp rate between 5-8 TSS/week, then you will be on the right track. At the end of the four week block, take a mandatory rest week no matter if you feel tired or not. This will guarantee that you don’t over-reach too much. The third strategy is to employ the full blown “block” training method for a period of 8-12 weeks. After you have been successful in strategy number 2, and you have enough time leading up to your priority “A” event, then employ this strategy.
Remember, on your hard training days, you have to ride hard or long, it can’t be a medium intensity workout, and you have to do this for a minimum of 3 days in a row, followed by days off and easy days. Your rest days are a minimum of 2 days where you ride easy or completely rest. Do not take more than 4 rest days though, as that will raise your TSB too much. Constantly watch your Performance Manager Chart to see your TSB numbers making sure that you continue to stay in negative territory (from -10 to -70). What you have successfully accomplished now is determining exactly when you need to rest! This is obviously a more advanced concept, but anyone with a power meter and TrainingPeaks WKO software can easily understand the data behind all the training.
Hunter Allen is a USA Cycling Level 1 coach and former Professional Cyclist. He is the co-author of “Training and Racing with a Power Meter, co-developer of TrainingPeaks Software, and is the CEO and Founder of the Peaks Coaching Group. This has been the 24th year that he has conducted training camps in the beautiful Blue Ridge Mountains.
How many weeks of hard training are you able to handle before a rest week? How much rest did you need before you created a peak wattage for the year? The end of the season is when each of you should be going through a period of reflection and analysis of your previous year of data. Using a power meter and recording your data for every ride/race you have done this year, should allow you to go back and start seeing some patterns in your training and racing that will help you to make some better decisions for the coming 2022 season. This kind of post season analysis is something that I do with each of my clients and it’s a critical part of the coaching process as each of us wants to create even more success in the coming year.
The first chart you should look at when examining your season is the Training Stress Score vs. Intensity Factor chart as this chart will present you a rough idea of how much training stress you can handle vs. the need for a recovery week. Whether or not you had a coach, or followed a loose training plan, this chart will reveal your rough periodization of training for the year and that’s a great place to discover a few interesting patterns. Looking at Figure 1, this racer had a solid and steady build-up of TSS through the season culminating in June. From June to the end of the season, his ability to create TSS was reduced because of the need to recover from weekend races, some summer travel and then a slight injury. There are a couple of interesting things that we can learn from this chart: 1) He can handle between 3-4 weeks of hard training before needing a true rest week. If we look at the green bars in Figure 1 and notice how after every 3-4 weeks, there is a smaller bar indicating a reduced amount of TSS for that week, this means that he had a planned easier week or he ‘had’ to take an easier week because the previous 3-4 hard weeks. This observation should be noted as a key characteristic of this rider and therefore can be planned around and watched in the upcoming 2022 season. 2) Later in the season after he had created a solid foundation of fitness, he was able to handle some very big TSS weeks, but those big TSS weeks ‘cost’ a lot. In order to handle them, I, his coach, had to taper and rest him beforehand and then rest him afterward. Of course, those were key goals for him, so it wasn’t a mistake to do those easier weeks, but it’s important to note the ‘cost’ of big goals and take them into account for the following season.
The next chart that I use for the end of the season analysis is the now ubiquitous (for power meter users) ‘Performance Manager Chart’(PMC). This chart goes a level deeper than Figure 1, as it takes into account the accumulated training load and fatigue throughout the season, while displaying the riders ‘best’ efforts. This display of best efforts is where you want to begin correlating your chronic training load and your training stress balance(how fatigued or fresh you are). By reviewing your season and connecting the dots on your peak performances, correlating this with your TSB, then you can learn your optimal range for how fresh you need to be in order to create a peak performance. This is incredibly valuable knowledge for the coming season, as it allows you to plan your taper exactly for any race you might want to create a peak performance for, which means you will have the best chance for success on the day that you want it. The Performance Manager Chart not only helps you with your taper, it also helps to determine your optimal training load. By reviewing your season, you can see the height of your training load with the chronic training load line and correlate this to your peak of fitness as well, along with your review of your notes and power files from that time, as this will remind you how well you rode during that time. In figure 2, this athlete’s PMC illustrates perfectly the relationship between freshness, fitness and ‘form’. Every time the athlete had a peak 20 minute for the year, his training stress balance(TSB) was either close to balance or a positive number, with most of his bests occurring when his TSB was +5 to +12, so we can use that knowledge for the coming year in order to plan for the perfect taper. His maximal training load that he could sustain for 2-3 weeks this season was around 80 TSS/day for the CTL, which means that he basically averaged(at his maximum) 50 minutes of equivalent threshold training stress each day for 6 weeks in a row. This is a good amount for an amateur masters racer, with 12-15hours a week to train and while he was able to build up to that training load, he was not able to go above it nor was he able to sustain it for more than a couple of weeks. That knowledge gives me valuable information about how to plan out his training for the coming season, so that I can make sure to give him the correct build of fitness at the proper time.
By utilizing these two charts, as his coach, I can now plan his weekly training load with more precision, knowing that when he exceeds 800 TSS per week for more than 3 weeks, I should pay close attention to his fourth week and prepare for a rest week if warranted. I can also understand the bigger picture better as well, since now I know that when his CTL begins to reach 80 TSS/day, that means I should watch how negative his TSB is and for how long, since it is an upper limit of his ability to sustain that training load, and while it might not be at the end of a 3-4 week build cycle, I can ensure that he has proper rest, along with the right amount of taper in order to either peak for an event or prepare for another build cycle. A proper post season analysis of your power data can reveal some relationships that you might not have otherwise seen, and it’s critical that you understand the correlations between peak wattages and fatigue, so that you can be sure to create your peak watts on the day that you want. These charts, while they could seem intimidating are really pretty simple to master once you understand the basic concepts. I highly recommend that you read the chapter on “Performance Manager” in my and Dr. Coggan’s book, “Training and Racing with a Power Meter”, as this will provide a more in depth discussion of these topics and help you to create the best season ever in 2022!
Everyone has seen a “Tractor Pull” on TV at one time or another, even if it has just been a commercial. What started out as a bunch of competitive farmers seeing whose John Deere tractor could pull the most mass over a field, has turned into insanely high horsepower “dragster” tractors, complete with flames coming out of the exhaust and pulling specialized weights with sliding loads. The original premise remains the same though and it’s about seeing which tractor has the greatest pulling capacity or torque producing ability. What does this have to do with cycling you ask? As cyclists, we also need this big burst of torque on occasions and while we normally have very low loads of torque, there are times we need to use this ability to accelerate in a sprint, to jump out of a corner, climb up a very steep hill and in track racing.
Tractor Pulling and bicycle racing.
One of the challenges of weight lifting when you are a cyclist is translating that new found strength into something useful on the bicycle. I once had a NFL linebacker in one of my power seminars. He could squat over 500lbs and for the life of him, he didn’t understand why he couldn’t ride with the best cyclists on the Tuesday evening ride. He said, “Man, I am strong. I put out 450watts when I just push down on the pedals, but I can’t stay with the best guys on the bike. I don’t get it.” The concept that I had to explain to him was that he had an incredible ability to create force on the pedals, but it wasn’t “effective force”. Meaning that he was “stretching” the crank arms at the bottom of the stroke, but wasn’t able to effectively use all his strength in a circular motion to create more forward movement. What he could do though was accelerate from a near dead stop in a 53:11 though and crush us all for the first 100meters, when his cadence became too fast for him to be effective any longer.
We all will have this problem (to a lesser extent most likely!), when we try to convert our new found strength gained in the weight room to the bicycle. Increasing your strength in the weight room can be easily done over a winter season, but typically that new strength is only applicable to the exercise you were doing like squats, or ham string curls, etc. The trick is taking that strength and making it effective on the bicycle, so that you go faster! How do you do that? Tractor Pulls, I tell you! Tractor Pulls!
Why you need “Tractor Pulls”
Before we go into the mechanics of “Tractor pulls”, let me further explain why you need to do them on the bike and why it’s critical to do them correctly. Lower cadence workouts are great to do in the winter transition period and throughout the winter really, because they can enhance your muscular strength, which in turn can help you to sprint with more peak wattages and to push a bigger gear into the wind, in a time trial or up a steep climb. Muscular strength (Tractor pulls) workouts are based around hard, but short intervals done in the biggest gear you can manage at a low rpm. Many people have long believed the myth that riding for hours in a big gear at a slow rpm will increase their muscular strength and consequently make them more ‘powerful’. However, this only makes you good at riding in a big gear at slow rpm’s! Riding at 50rpm for hours on end is just not creating enough muscular stress in order to strengthen the muscles. You can think of this analogy: If you are trying to bench press 200lbs, then you need to start at 150lbs. and build up to it with low reps, high sets and the most weight you can lift. You have to use heavier and heavier weights to stress the muscle in order for it to adapt. Now, if you lifted 100lbs, but one million times, you would never adapt to lift 200lbs. for one rep. This is similar in this ‘big gear’ myth in that when you are pedaling at 50rpm for hours on end, it’s just like lifting 100lbs. for a million reps. While 100lbs. (metaphorically speaking) is more than your normal pedaling force of 80lbs., it’s just not enough stress on the muscles to get them to strengthen. In order to increase your muscular strength on the bike, then you need to do hard, short bursts of effort in a big gear.
The mechanics of the Tractor Pull is simple, but important. First off, they are usually better done while you are in the saddle the entire time of the effort. Secondly, in order to elicit the most force, you’ll want to do these on a flat road or false flat upward slope. For example, put your chain in the 53:12 gear and slow down to about 5-8mph, then while you stay seated, tighten your abdominals, grip your handlebars tightly and then with all your force, turn that gear over until you reach 85rpm. Once you have reached 85rpm, then the amount of force you are putting on the cranks has reduced to a point at which it’s just not enough stress to create muscular strength improvements. You should plan on doing about twenty of these power bursts in a session in order to create enough of an overload to achieve some benefits. See figure one to understand what this looks like in a power file.
Besides seeing the correct way the tractor pull should look in the graph, you should also confirm that you executed the tractor pulls correctly, by looking at the Quadrant Analysis scatter plot. Most if not all the points from your tractor pulls should in quadrant II, where the high force and low cadence intersect. When you see the dots in QII, that’s a great confirmation you elicited the right amount of force from the workout. The higher the dots are up in the upper left quadrant, the better you did!
Now you know the secret of how to take your hard work in the weight room and make it effective force on the bike. I suggest in the month of January and February that you do at least two of these workouts every week, and of course this work should be done at the beginning of the workout when you are the freshest and have the most strength to apply. This also means that you’ll want to do some tractor pulls at the beginning of a workout that addresses other energy systems as well. I would suggest doing tractor pulls before your sweet-spot 2 x 20’s or before your FTP 4 x 10 intervals and even at the beginning of a kitchen sink workout. These are great additions to riding on the indoor trainer as well, and are easy to execute correctly, just remember if you can’t reach 85rpm in less than 30 seconds, once you reach 30seconds the interval is over. Your sprint, your explosive snap, your time trial and ability to charge up steep hills will be forever changed for the positive!
Cookie Consent
We use cookies to improve your experience on our site. By using our site, you consent to cookies.
Contains information related to marketing campaigns of the user. These are shared with Google AdWords / Google Ads when the Google Ads and Google Analytics accounts are linked together.
90 days
__utma
ID used to identify users and sessions
2 years after last activity
__utmt
Used to monitor number of Google Analytics server requests
10 minutes
__utmb
Used to distinguish new sessions and visits. This cookie is set when the GA.js javascript library is loaded and there is no existing __utmb cookie. The cookie is updated every time data is sent to the Google Analytics server.
30 minutes after last activity
__utmc
Used only with old Urchin versions of Google Analytics and not with GA.js. Was used to distinguish between new sessions and visits at the end of a session.
End of session (browser)
__utmz
Contains information about the traffic source or campaign that directed user to the website. The cookie is set when the GA.js javascript is loaded and updated when data is sent to the Google Anaytics server
6 months after last activity
__utmv
Contains custom information set by the web developer via the _setCustomVar method in Google Analytics. This cookie is updated every time new data is sent to the Google Analytics server.
2 years after last activity
__utmx
Used to determine whether a user is included in an A / B or Multivariate test.
18 months
_ga
ID used to identify users
2 years
_gali
Used by Google Analytics to determine which links on a page are being clicked
30 seconds
_ga_
ID used to identify users
2 years
_gid
ID used to identify users for 24 hours after last activity
24 hours
_gat
Used to monitor number of Google Analytics server requests when using Google Tag Manager
1 minute
Marketing cookies are used to follow visitors to websites. The intention is to show ads that are relevant and engaging to the individual user.
Facebook Pixel is a web analytics service that tracks and reports website traffic.
Registers a unique ID to keep statistics of what videos from YouTube the user has seen.
Session
DEVICE_INFO
Used to detect if the visitor has accepted the marketing category in the cookie banner. This cookie is necessary for GDPR-compliance of the website.
179 days
LOGIN_INFO
This cookie is used to play YouTube videos embedded on the website.
2 years
VISITOR_PRIVACY_METADATA
Youtube visitor privacy metadata cookie
180 days
GPS
Registers a unique ID on mobile devices to enable tracking based on geographical GPS location.
1 day
VISITOR_INFO1_LIVE
Tries to estimate the users' bandwidth on pages with integrated YouTube videos. Also used for marketing
179 days
PREF
This cookie stores your preferences and other information, in particular preferred language, how many search results you wish to be shown on your page, and whether or not you wish to have Google’s SafeSearch filter turned on.